PartyLabz is a versatile event management platform that comes with a variety of useful features. One of the core functionalities is the Sign-Up List, which allows for easy organization and coordination of various activities, making your event planning smooth and efficient.
Use cases
Let's explore the different use cases for the Sign-Up List feature:
Sell Products
In this use case, each item on the Sign-Up List can represent a product that you want to sell. You can list the quantity available for each product, and guests can sign up for whatever they wish to buy. Once they sign up, they can pay for the items immediately through PartyLabz as it uses Stripe for payment processing. Make sure to link your Stripe account to PartyLabz, and note that the service takes a 2% fee on transactions.
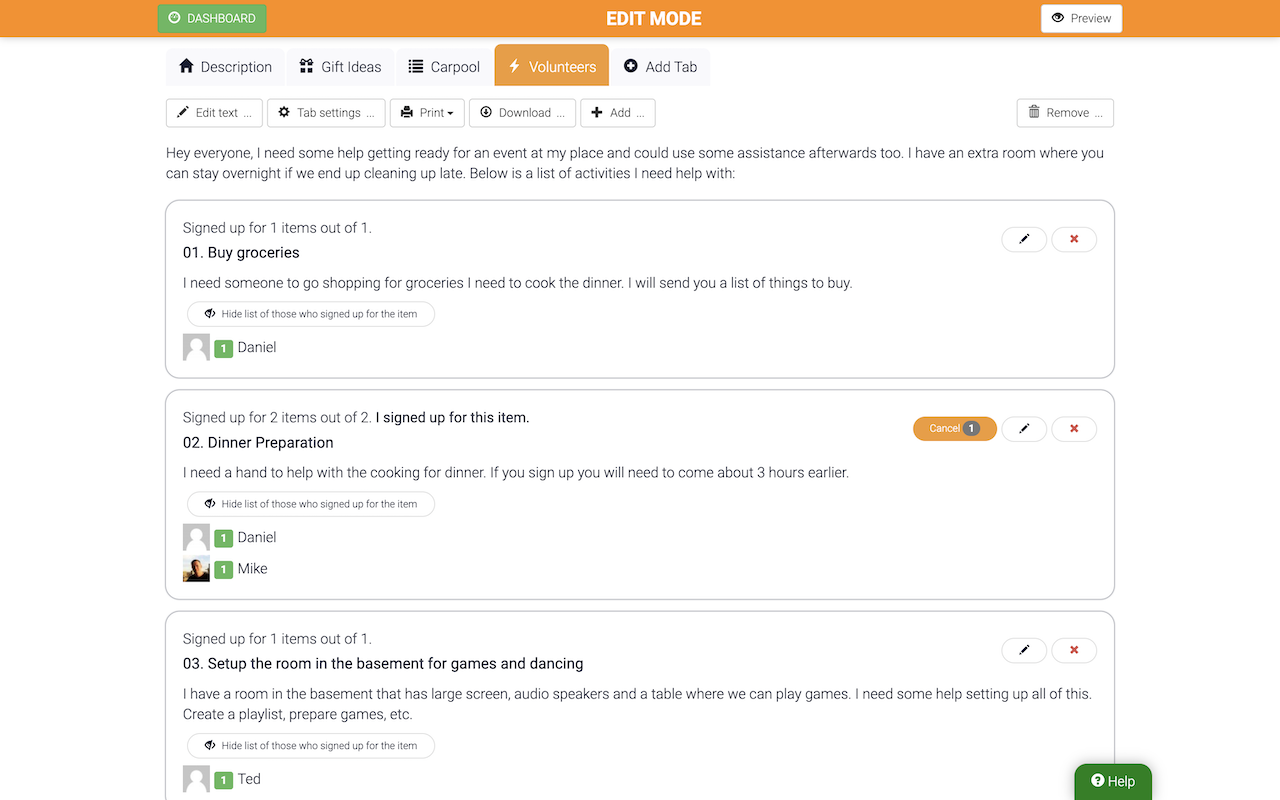
Volunteer Sign-Up Sheet
When organizing events that require volunteer assistance, this use case can be particularly helpful. Each item on the signup sheet represents an activity or task for volunteers to sign up for. Whether it's setting up the venue, serving food, or cleaning up afterward, you can easily track which activities are covered and which still need volunteers.
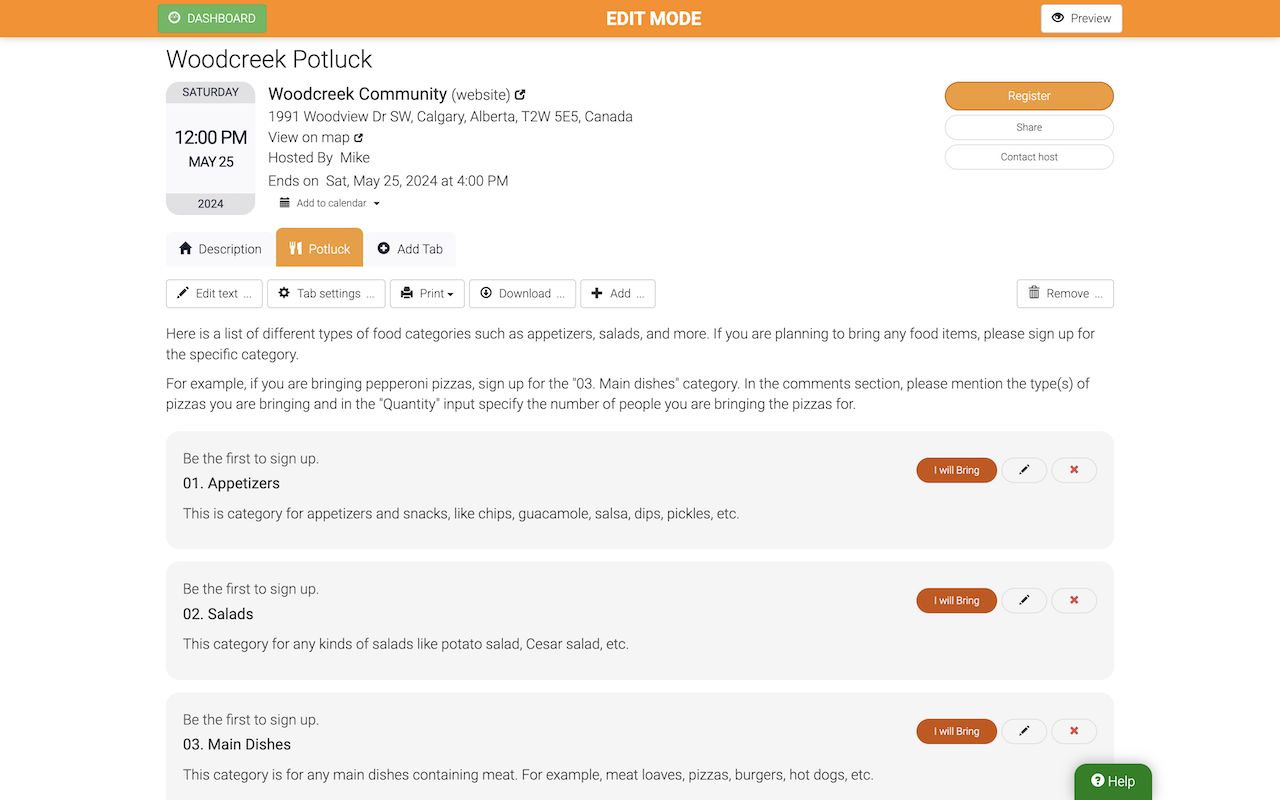
Potluck Sign-Up Sheet
Hosting a potluck event? Manage food contributions effortlessly with this use case. Each item can represent a food category such as appetizers, main dishes, and beverages. Guests sign up for the category they want to contribute to and can specify their dish in the comments (e.g., chicken bites, chicken wings, etc.). Alternatively, each signup item can be a specific dish, allowing guests to choose and avoid duplication.
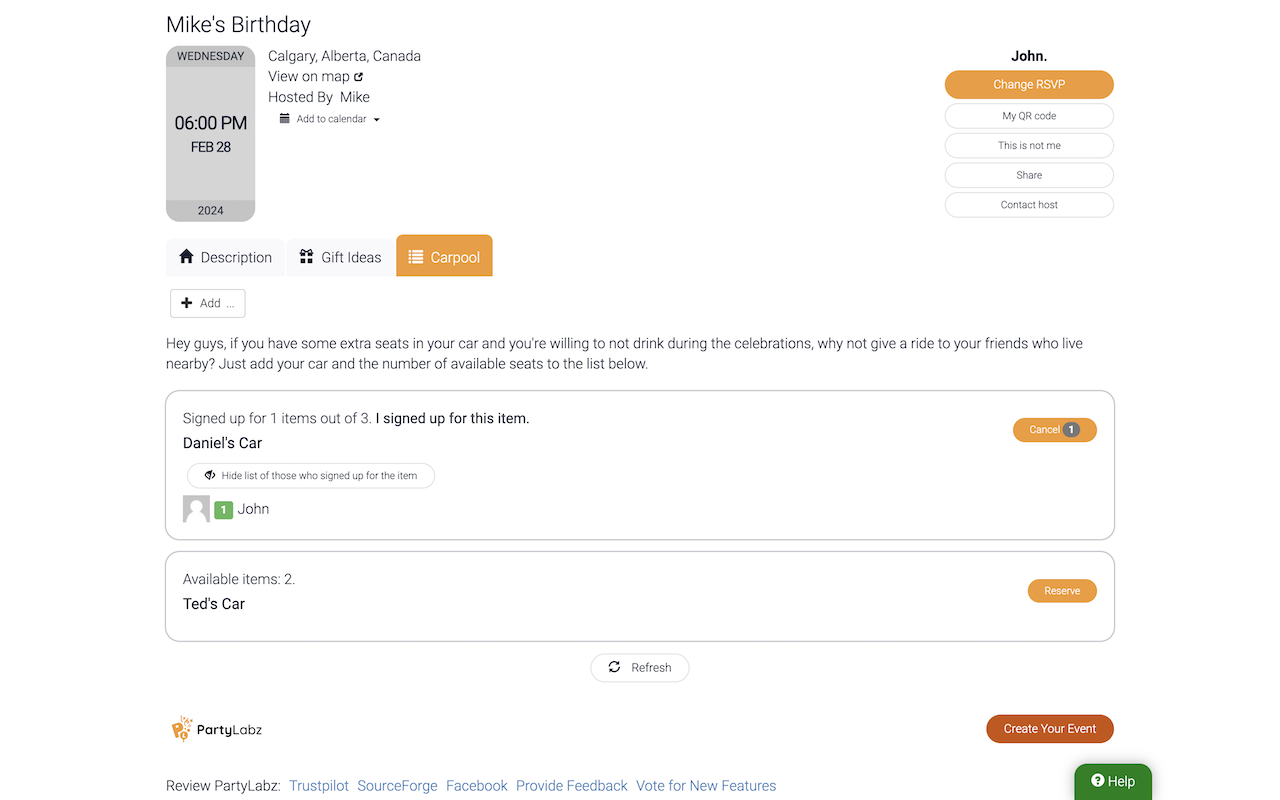
Carpool Coordination
Optimize transportation for your event by using the Carpool Sign-Up Sheet. Each item represents a car, and the available quantity is the number of seats in the car. Guests can sign up based on the car they wish to get a ride from, making it easy for everyone to find transportation to and from your event.
Gift Registry
A Gift Registry is perfect for occasions like weddings, baby showers, or birthdays. Each item can be a gift category such as "Clothes", "Footwear", or "Board Games". Guests sign up to buy items within these categories and leave comments on what specific gifts they've purchased. Alternatively, you can list specific presents to avoid duplication and ensure all your needs are met.
Accommodations
Organize lodging for guests effectively with this use case. Each item can represent a room with a certain number of beds or a hotel with a specific number of rooms. Guests can then sign up for beds in rooms or rooms in hotels, streamlining the accommodation arrangement process. You can also ask guests to pay for their selected accommodations right away using PartyLabz's built-in payment functionality via Stripe.
Menu Planning
Plan your event's menu effortlessly with the Menu Sign-Up Sheet. Each item represents a dish, and guests can sign up for the dishes they want. This method ensures you have a variety of food options and helps you keep track of what will be served. Additionally, you can have guests pay for their selected menu items right away through the platform, making it convenient for both planning and payment.
Sub-Events
If your main event includes multiple sub-events like a rehearsal dinner, ceremony, photo shooting segment, and reception, use the Sub-Event Sign-Up Sheet. Each item represents a sub-event, and you can limit the number of attendees for each one. This helps in organizing and managing crowd sizes efficiently. Moreover, you can ask attendees to pay for their selected sub-events right away using the built-in payment functionality.
Example
Here are some examples of events that use the "Signup List" feature.
How to create a signup list
Assuming you've already set up your event website and adjusted it according to your needs, this section provides guidelines on using the "Signup List" feature.
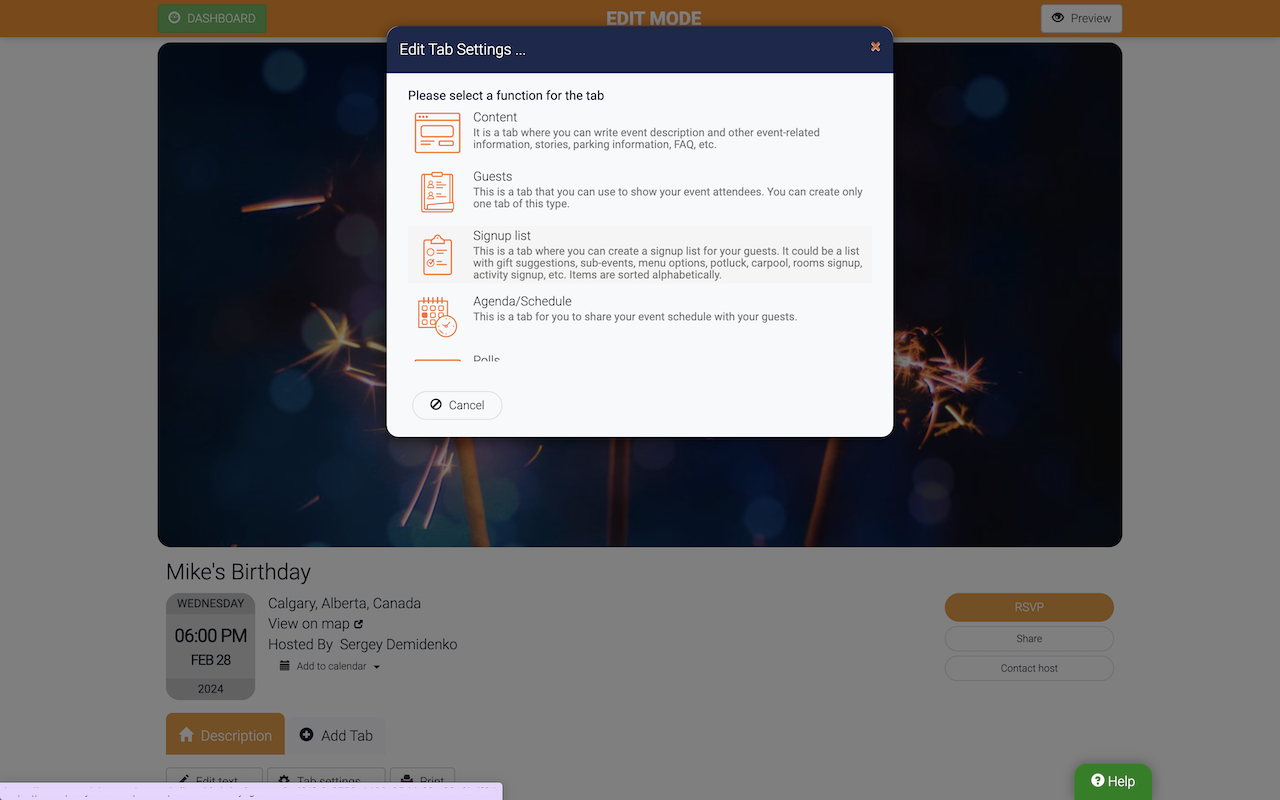
To add a "Signup List" tab to your event website, navigate to your "Dashboard" page and locate the "Edit Event Website" button. From there, click on the "Add tab" option next to the Description tab. Choose the "Signup List" function and provide a name for the tab, select an icon, and set viewing permissions and other preferences, such as a custom name for the "Signup" button. Once all settings are configured, click "Save" to create the tab. After creation, you can click the "Save" button on the tab's toolbar to begin adding sign up list items.
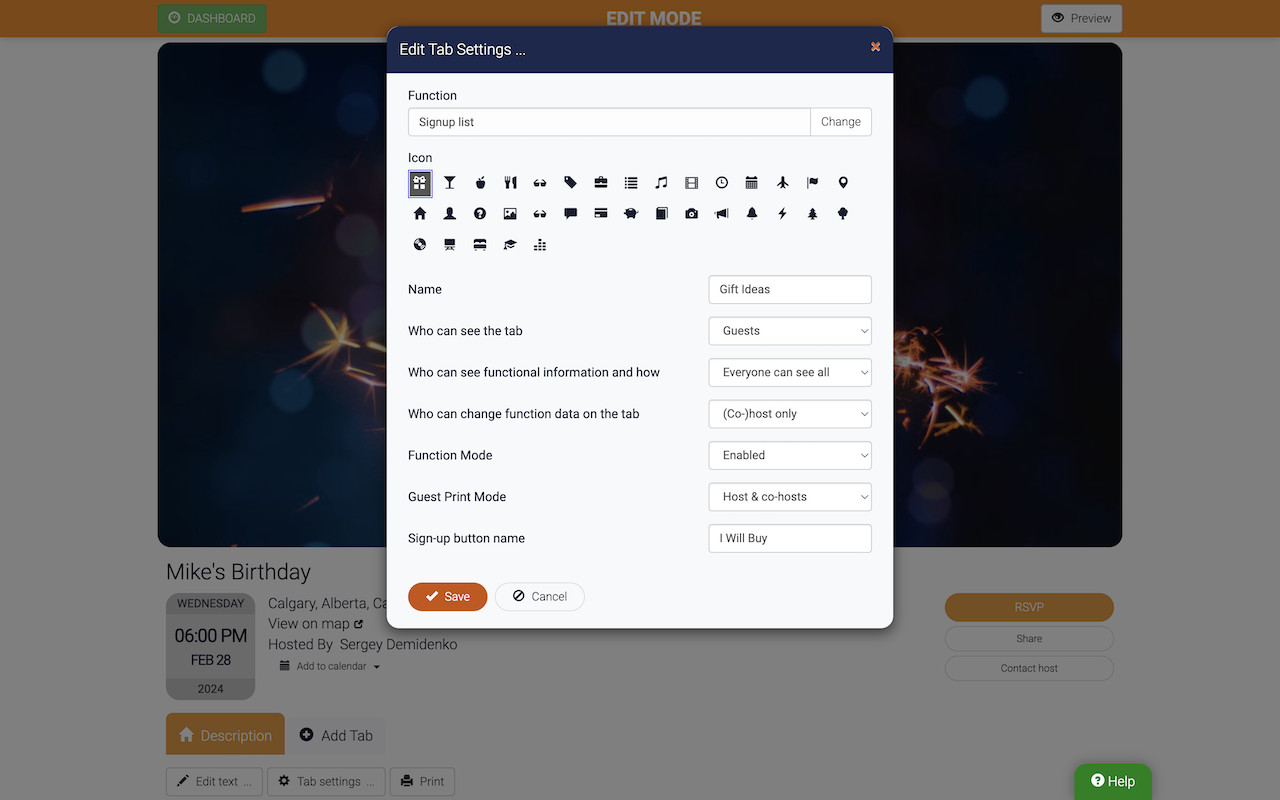
The "Signup List" tab comes with various configuration options:
- Who can see the tab: This option allows you to decide who can view the signup list. You can make it visible to everyone, including anonymous visitors, or limit it to recognized guests or only the host and co-hosts during the planning stage.
- Who can see functional information and how: You can control who sees the signups of others. This can be set so everyone sees all the signups, only recognized guests see all signups, or recognized guests see their own signups only.
- Who can change functional data on the tab: This feature lets you choose who can add new signup items. You can grant this permission to only the host/co-hosts or extend it to recognized guests. This is helpful when organizing activities like potlucks or carpooling, where participants might need to add what they are bringing or their car information.
- Function mode: Decide whether signups are allowed and if they should be stopped at a specific date. This can help you manage the timelines for signups effectively.
- Guest Print Mode: Guests can print signup reports to have a physical copy of the details they signed up for. This helps them keep track of their commitments to your event.
- Signup Button Name: Customize the name of the signup button based on your event's theme or functionality.
- Guest Data Entry Quantity Limit: This lets you specify the number of unique items a guest can sign up for. This is handy when you want to ensure that volunteers or participants do not overwhelm the list by signing up for multiple activities.
- Enable sales for the tab: This newly added feature allows you to enable sales for the signup list items. Each item will have price and tax fields activated, and the system will collect payments from guests directly on the tab. This is very helpful when event hosts need to collect payments from guests in advance for whatever guests sign up for.
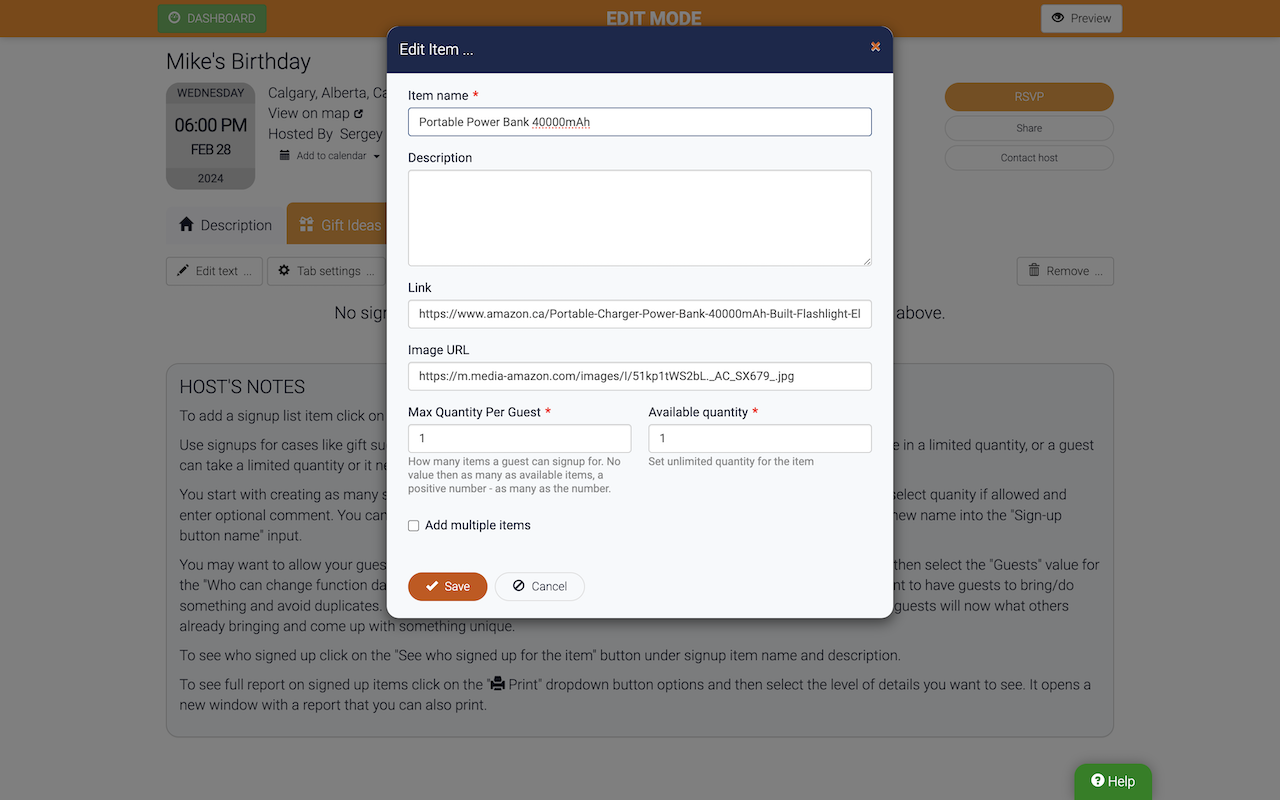
When adding items to the signup list, you have the flexibility to provide detailed information for each entry:
- Name: The name of the item.
- Description: Additional details or information about the item.
- URL: A link where guests can find more information about the item on an external website.
- Image: Users can select an image from their uploaded "Media Files" or upload a new one directly.
- Available Quantity: Specifies the total quantity of this item. If set to 0, it means an unlimited number.
- Max Quantity Per Guest: This sets the maximum number of items a guest can sign up for. If left blank, a guest can sign up for all available quantities.
- Price: The cost of the signup list item, in the currency set by the host on the "Payment Settings" page.
- Tax: The tax percentage to be added to the total amount, which is calculated by multiplying the price by the quantity the guest signs up for. Note that hosts are responsible for paying collected taxes.
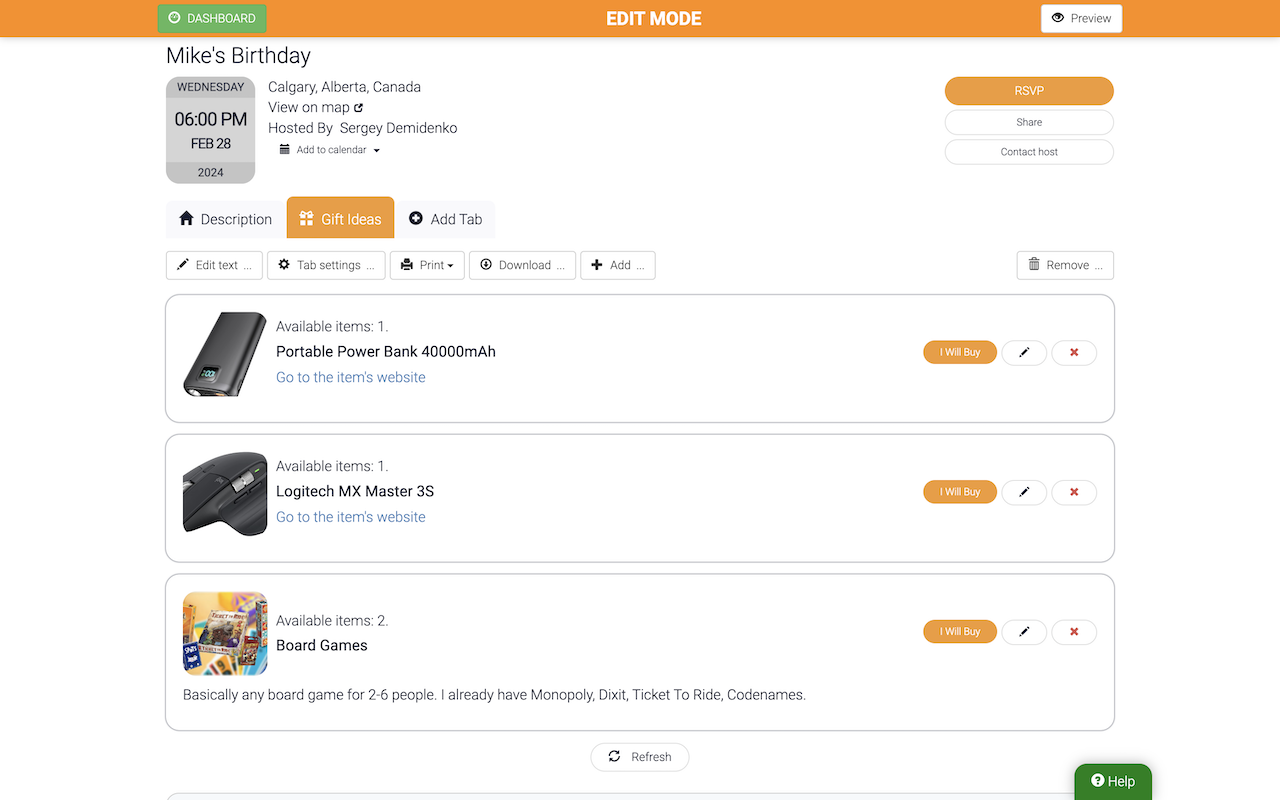
The signup list is presented differently for hosts and co-hosts as opposed to regular guests. Hosts and co-hosts have access to signup, edit, and remove actions for each item, while guests can only sign up or edit/remove the items they have created, provided the host has permitted guests to create their own items. Additionally, hosts can view reports, download data, or create signup list items.
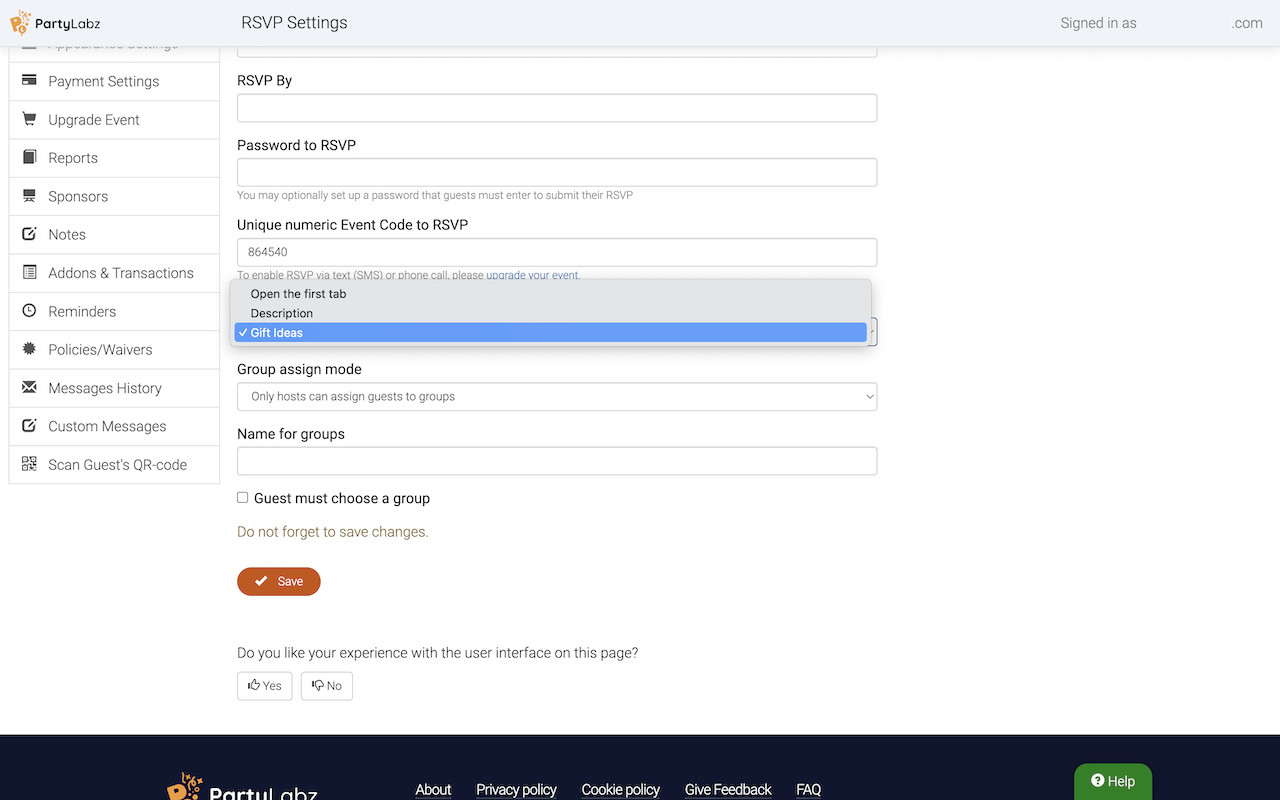
To automatically redirect guests to your signup sheet right after they RSVP for the first time, follow these steps:
- Go to the "RSVP Settings" page.
- In the dropdown menu labeled "Tab to open after guests RSVP the first time," select the desired tab.
- Click on the "Save" button to apply the changes.
How to sign up for signup list items
Please note that only recognized guests can sign up for items. A recognized guest is someone who visits your event website using a personal RSVP link. An anonymous guest becomes a recognized guest immediately after RSVP'ing and staying on your website. If they leave your website and want to access your event website with their personal link, they can find it in the RSVP confirmation email sent by our system. The personal link is also available in an invitation email or text if you invited guests using PartyLabz.
If a guest leaves your website and wishes to obtain their personal link, they can do so by visiting your event website, clicking on the "I have already RSVP'd" button, and entering their email address. In this case, our system will send them their personal link to the provided email address, which must be in your event guest list.
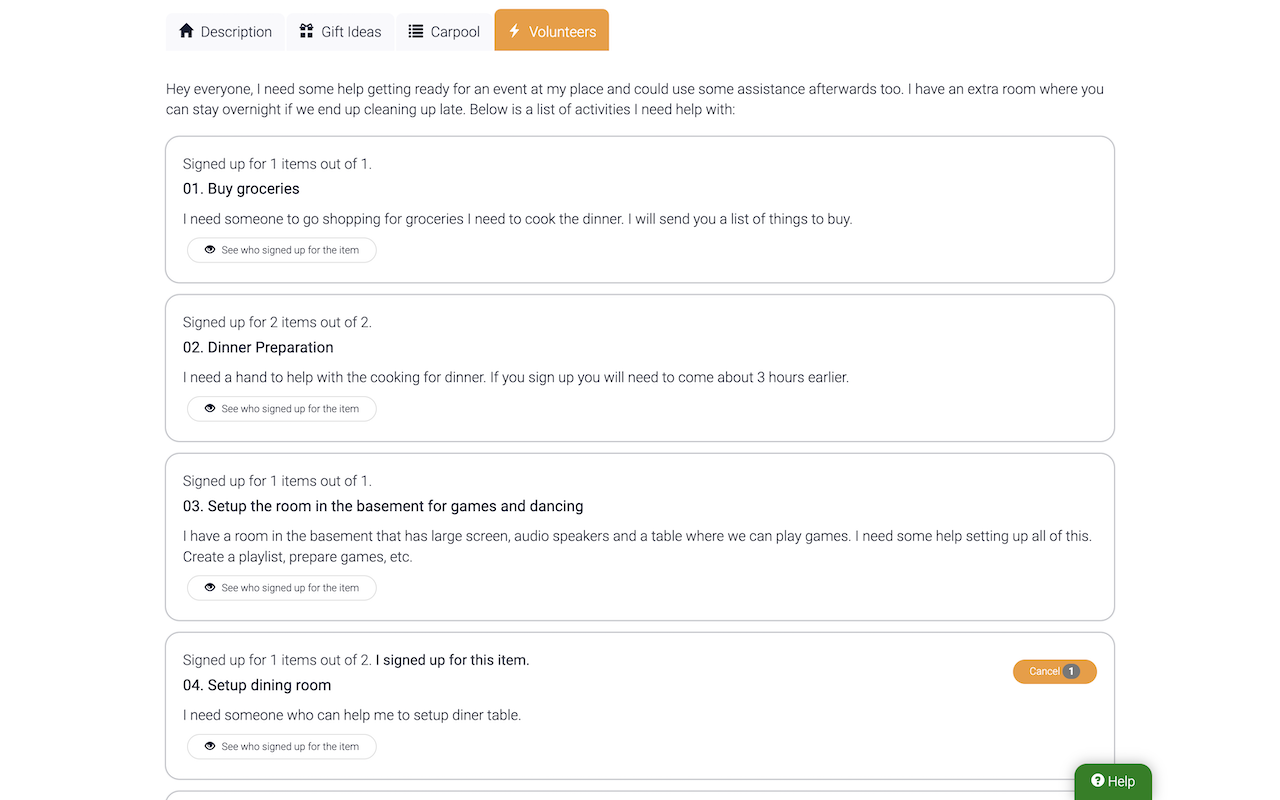
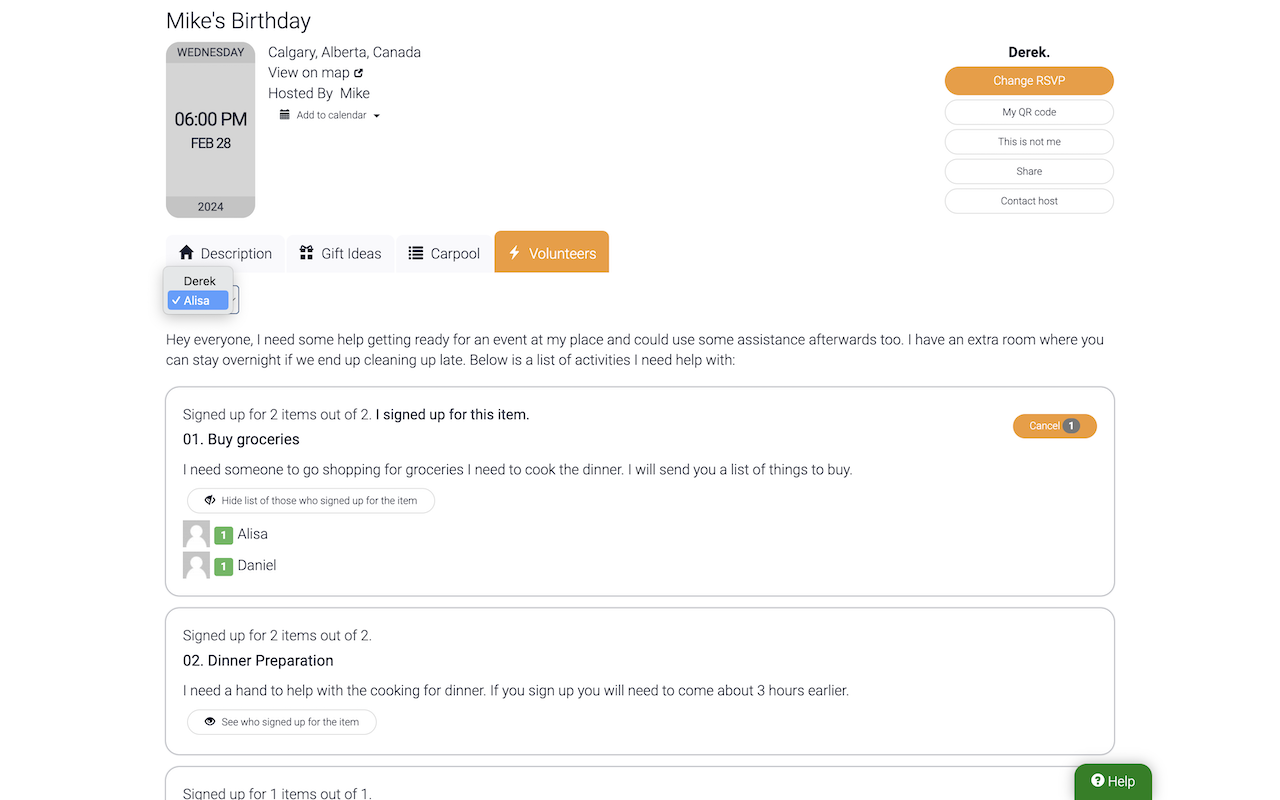
Here is how the signup list looks for your guests:
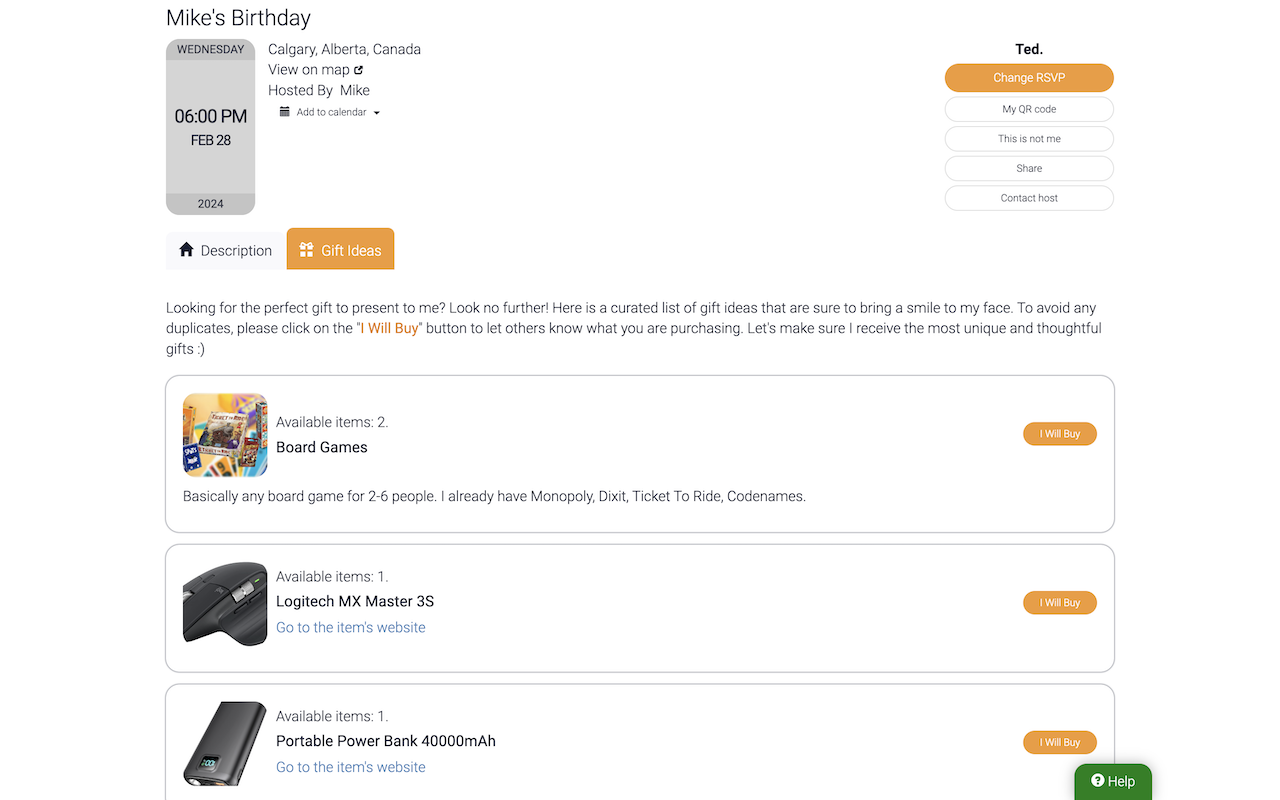
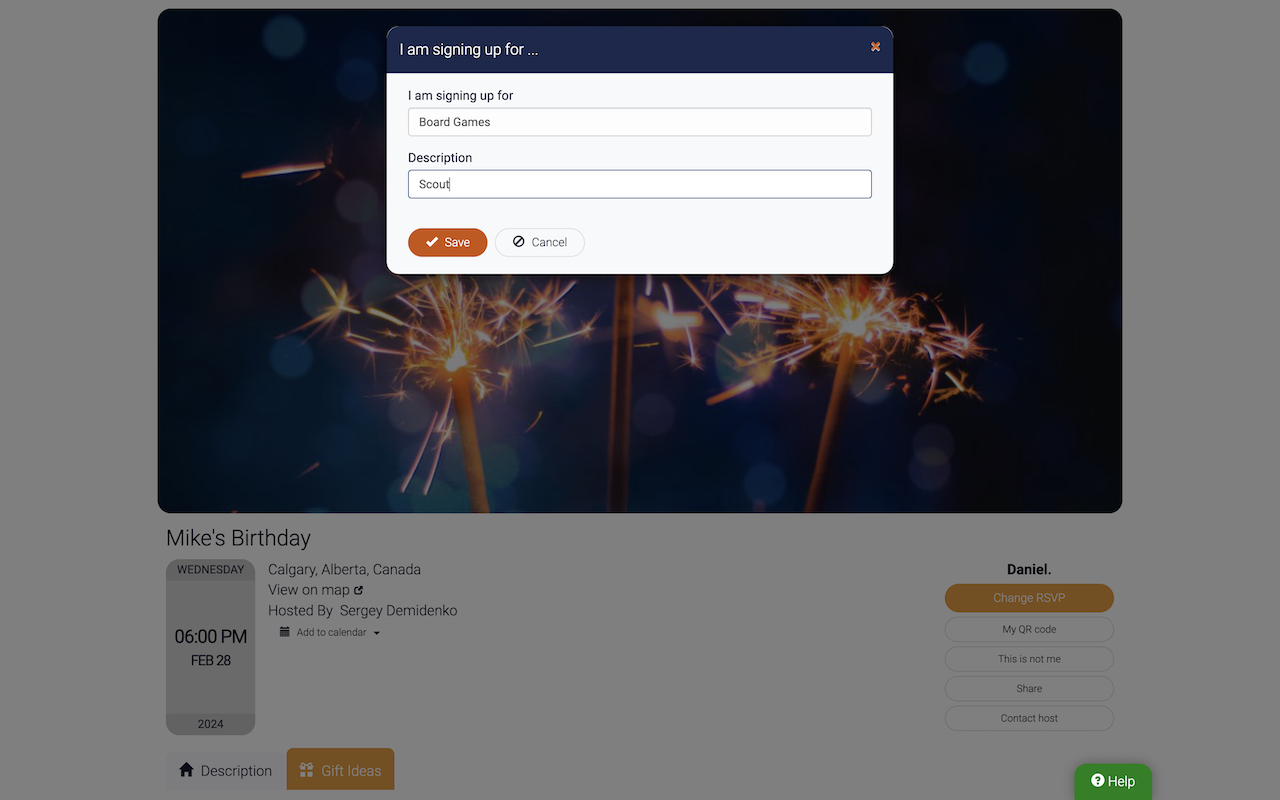
Guests can sign up for as many items as they want. To sign up, they just need to click on the "Signup" button. Please note that the button can be customized with your preferred name. In the popup dialog, they can choose the quantity (if allowed) and add comments.
Once a guest signs up for an item, the "Signup" button will change to a "Cancel" button. This allows guests to cancel their signups if needed. The ability to cancel signups may be disabled by the host under certain conditions, such as when the "Function Mode" is set to "Disabled" or "Cut-off at," and the current date is equal to or after the specified date in the "Cut off the tab functionality at" setting.
If the host allows it, guests can view a list of who has signed up for each item:
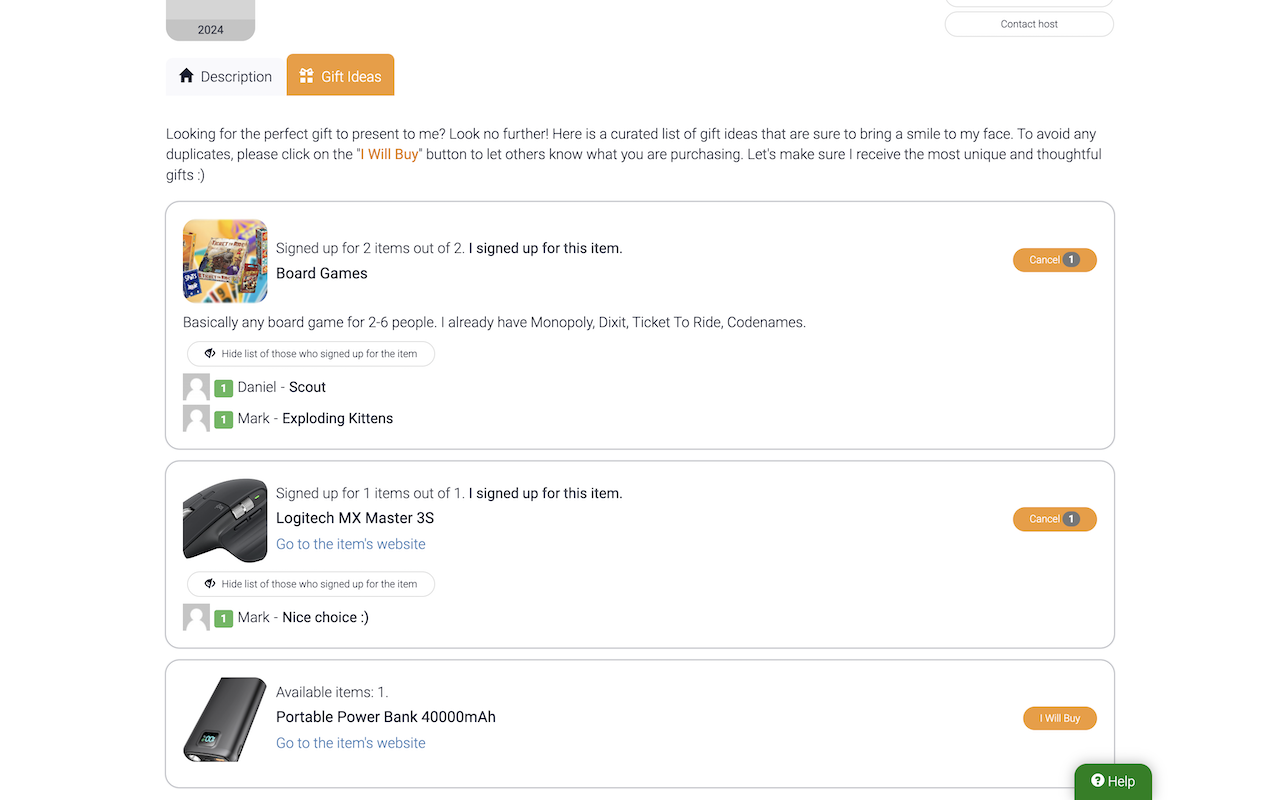
The comments field provided by guests can be useful to avoid duplication in scenarios like potluck signup sheet or gift registry.
If a guest mentions the names of accompanying guests, it's possible to select them from the dropdown and sign up on their behalf.
How to Check Who Signed Up for Which Items
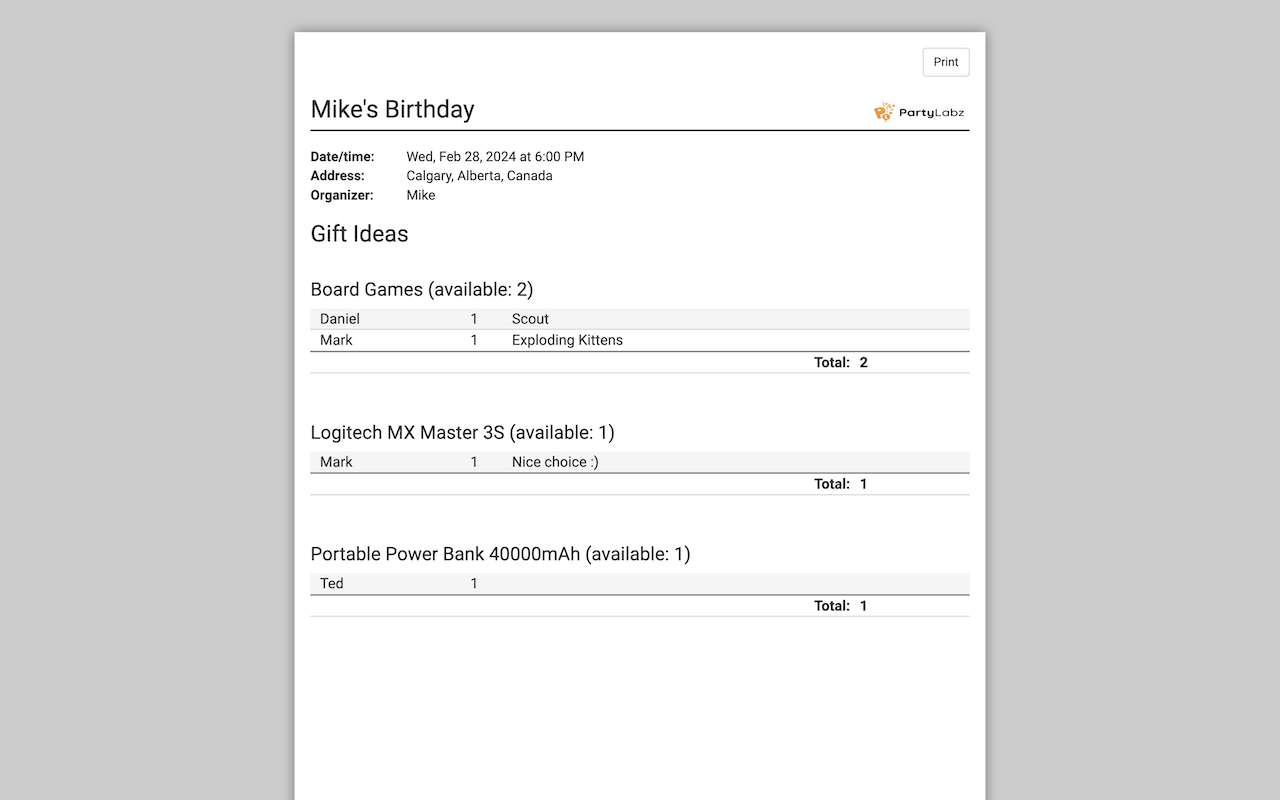
Hosts and co-hosts can view and print reports for the signup list. To do this, go to the "Dashboard" page, click on "Edit Event Website," and navigate to the tab containing the signup list. The tab will feature a dropdown button labeled "Print," offering the following options:
- Print (Group by items): Grouping by item: This report organizes information by item, showing the item name and a list of guests who signed up for it, including quantity and comments.
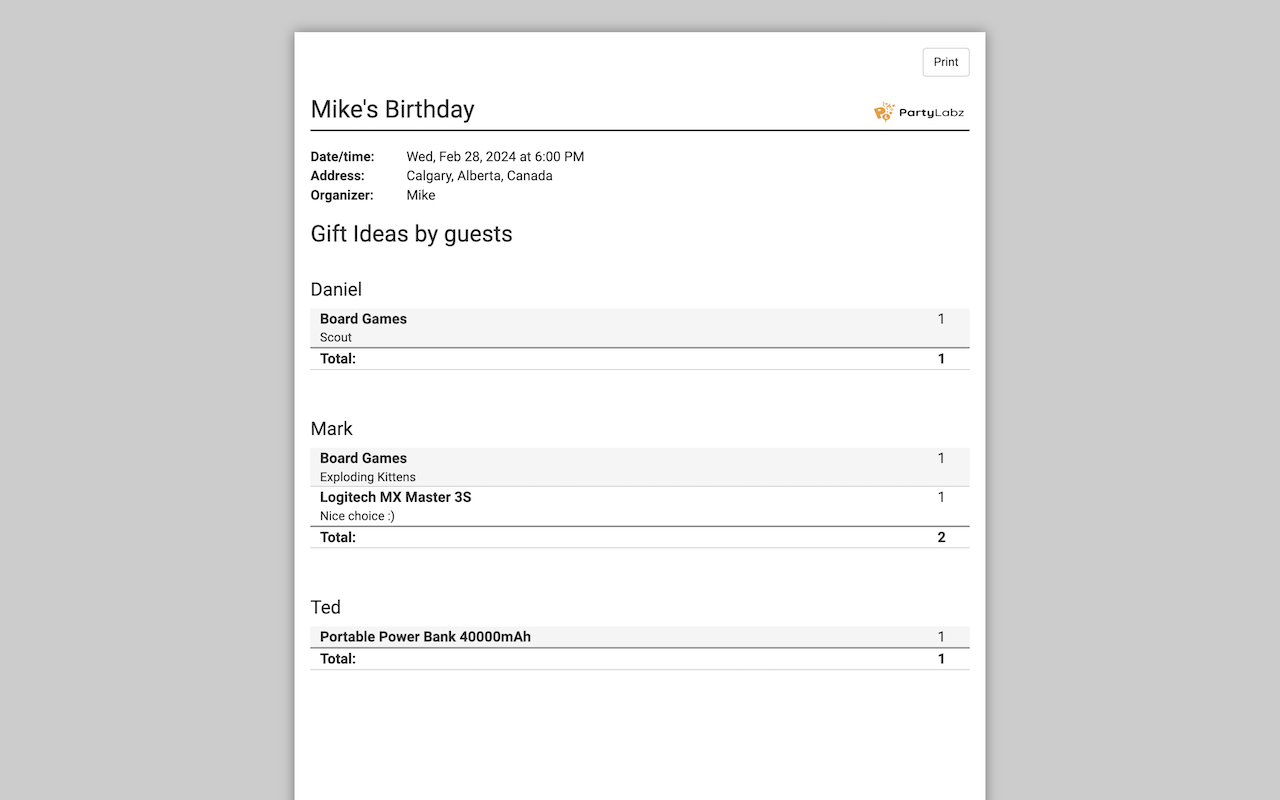
- Print (Group by guest): This report displays guest names and a list of items each guest signed up for along with their comments.
When you click on any of the menu options, a new browser window/tab will open with the selected report data, and the report is ready for printing.
Users can also download a detailed report into a CSV file for further analysis in a spreadsheet application.
The "Signup List" functionality proves to be a valuable tool, simplifying the preparation for your event in numerous ways.
Conclusion
The Sign-Up List feature from PartyLabz offers a versatile solution for various needs, including selling products, coordinating carpool rides, organizing volunteers, and managing event sub-segments. The straightforward and user-friendly functionality ensures your event is well-organized, meeting all your planning requirements. Plus, with the option to have guests pay right away through PartyLabz's Stripe integration, managing expenses and transactions becomes simpler for everyone involved.
Do you find content on this page helpful?