Selling event tickets shouldn't break the bank or your brain. If you're looking for the easiest and most affordable way to sell tickets online (especially if your tickets are under $50), PartyLabz is your solution! Create a stunning event website in minutes, customize it to your heart's content, and start selling tickets with just a few clicks.
Video Tutorial
Ticketed Event Example
Here's how to get started
Step 1: Create Your Event Website in Minutes
Building your event website with PartyLabz is quick and easy. Just enter your event name and host name, then follow our simple wizard to add the date, time, location, description, and an eye-catching image or video. It is important to select "Ticketed" event type on the "Settings" step. You can further customize your website after wizard is complete.

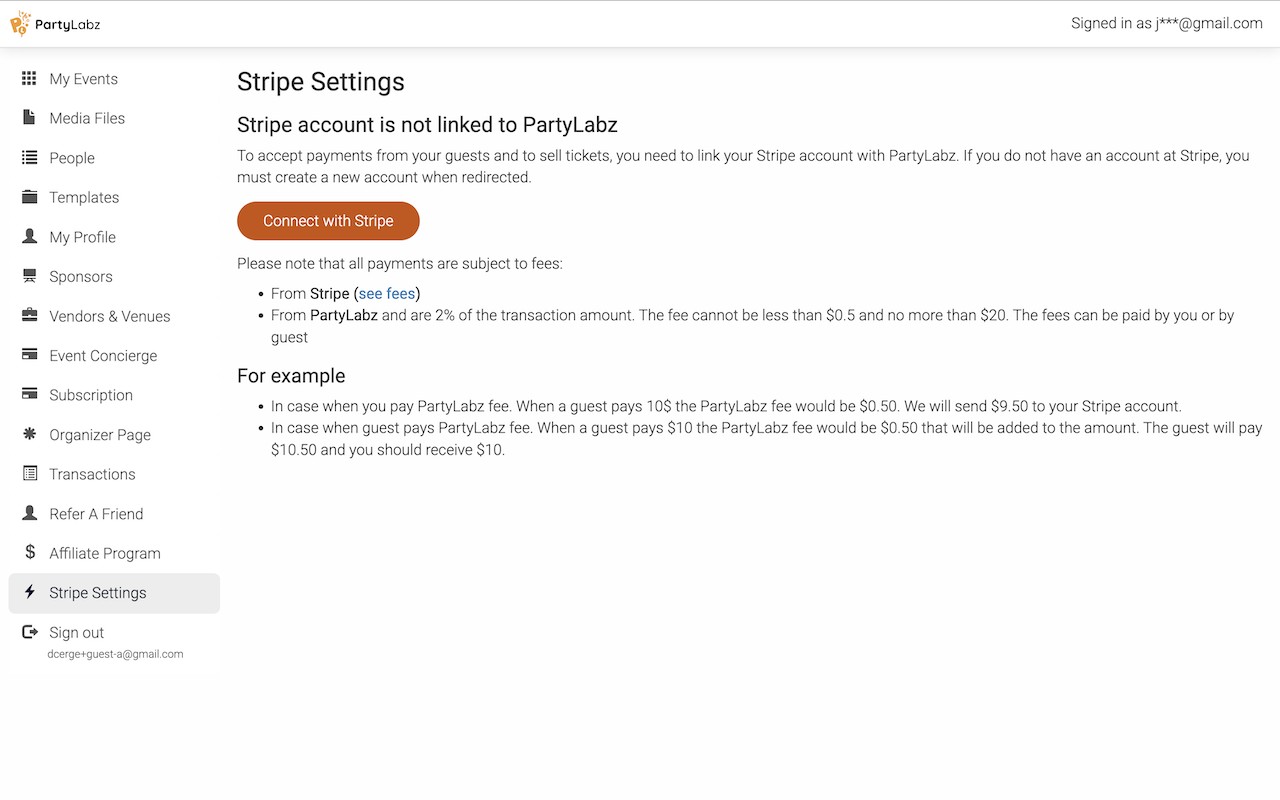
Step 2: Set Up Your Payment Gateway
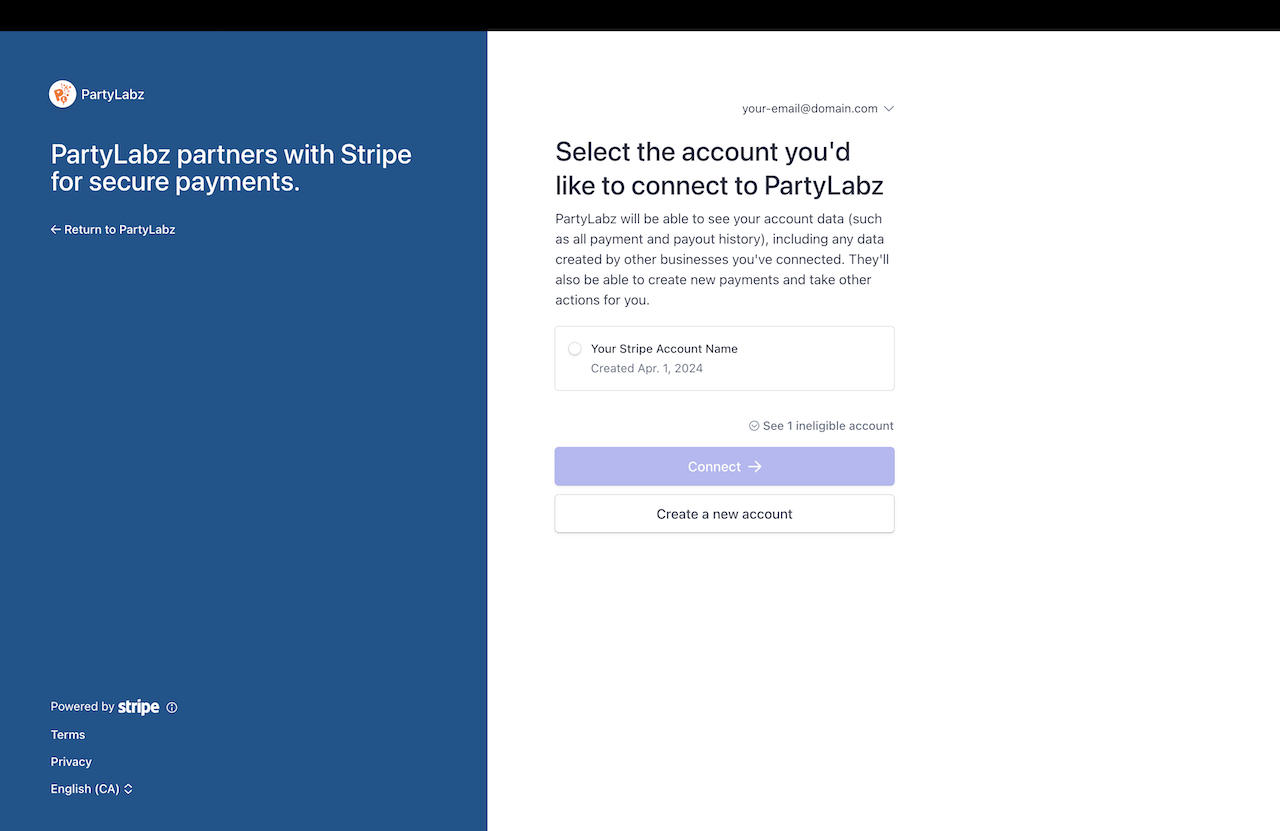
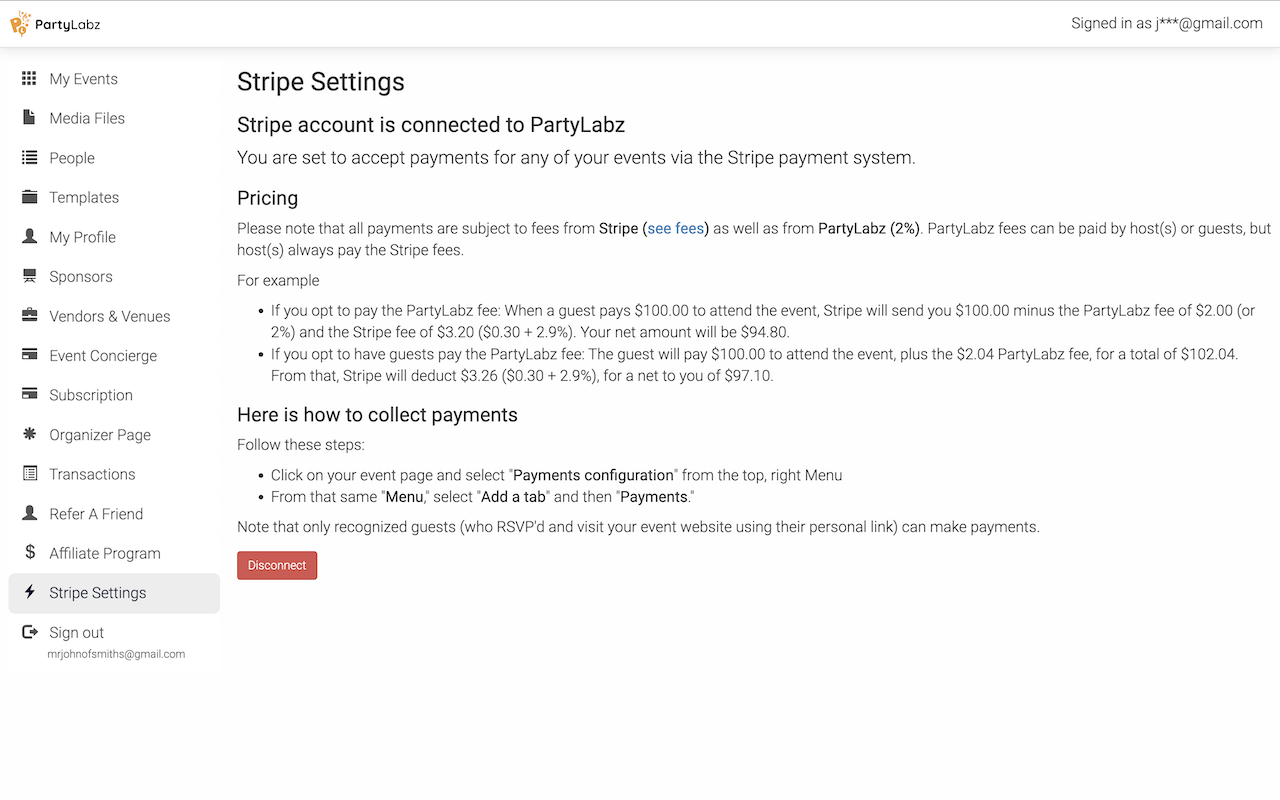
To start selling ticketss, you need to create a Stripe account if you don't already have one. Stripe is a secure online payment processor that will handle the financial transactions for your ticket sales. Once you've set up your account, link it to PartyLabz.
Go to the "My Events" page within PartyLabz. From there, navigate to the "Stripe" page and click on the "Connect with Stripe" button. You'll be redirected to Stripe to complete the connection process.
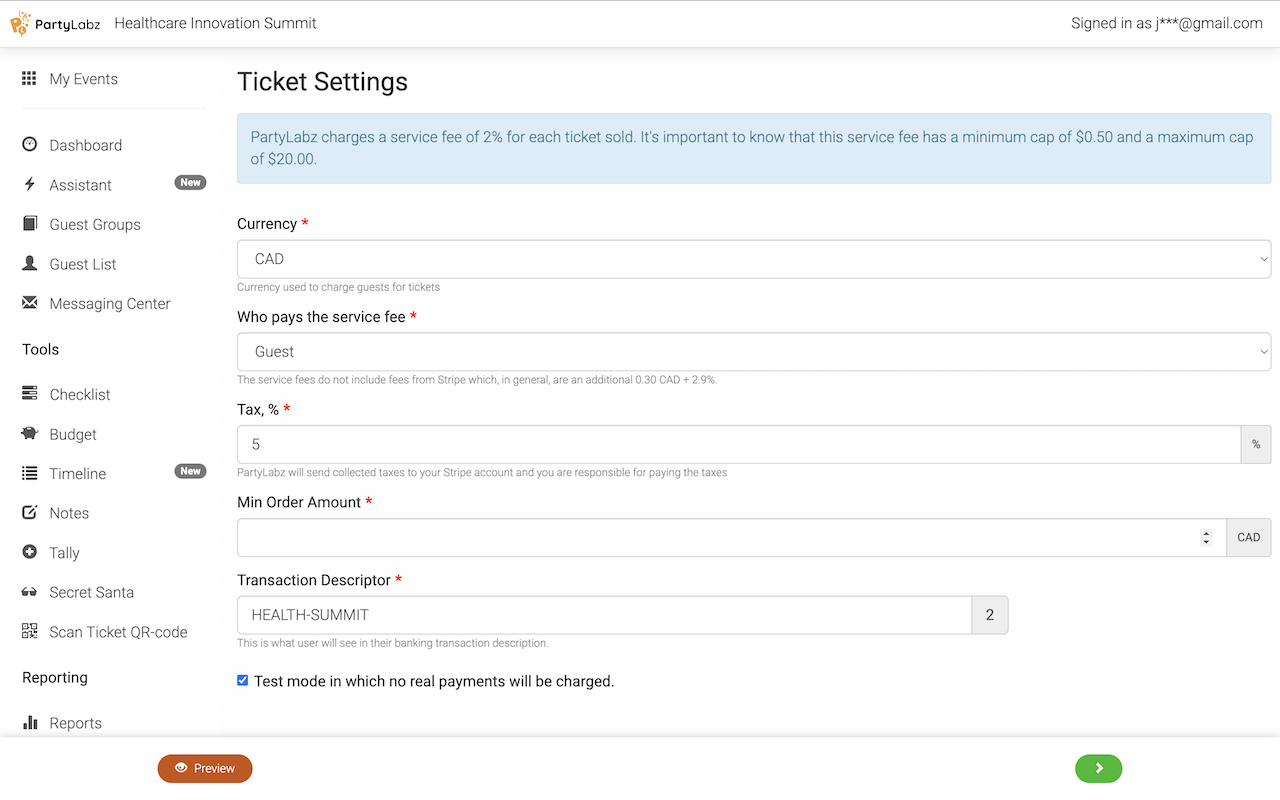
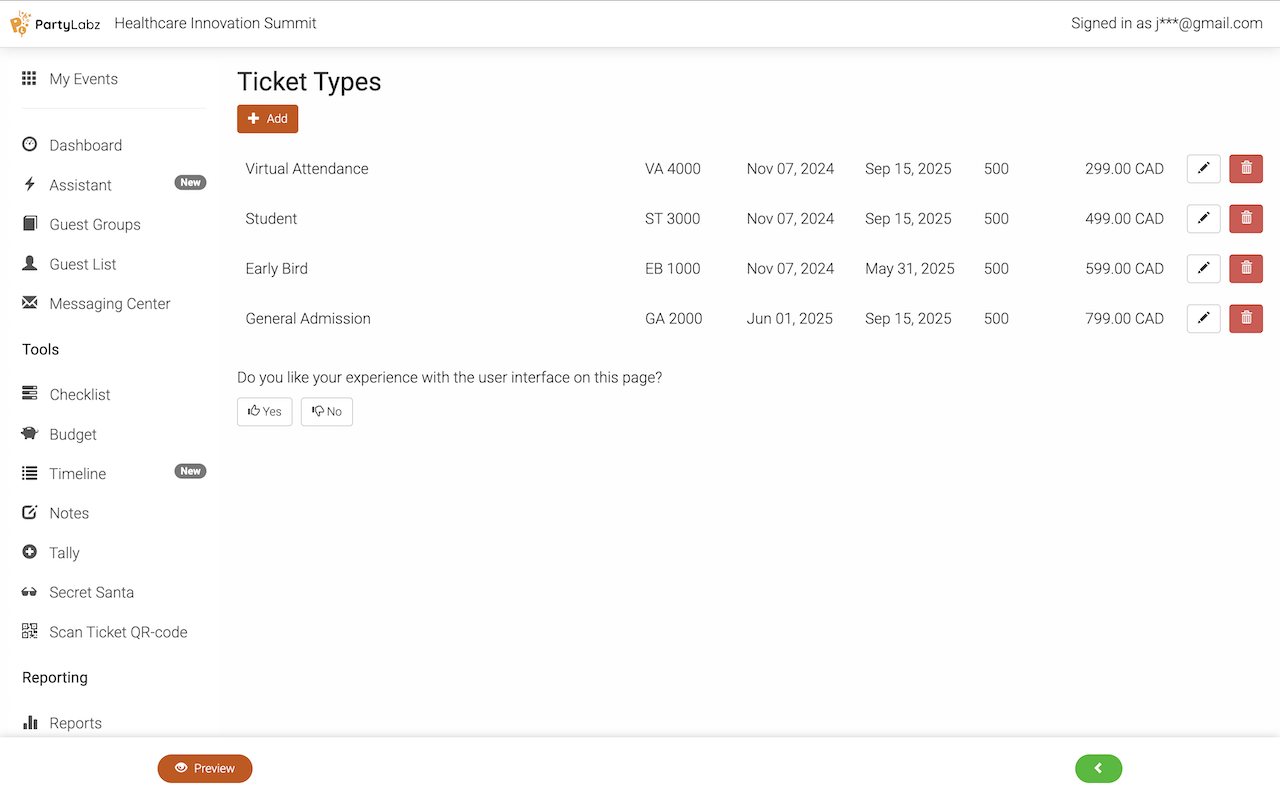
Step 3: Set Up Your Ticketing Options
Next, go to the "Ticket Settings" page to set your preferred currency, taxes, and a transaction descriptor that will appear on attendees' credit card statements.
From your event Dashboard, go to "Ticket Settings" to configure your ticketing options. Here you can choose your preferred currency, add any necessary taxes, and customize how the transaction appears on credit card statements.
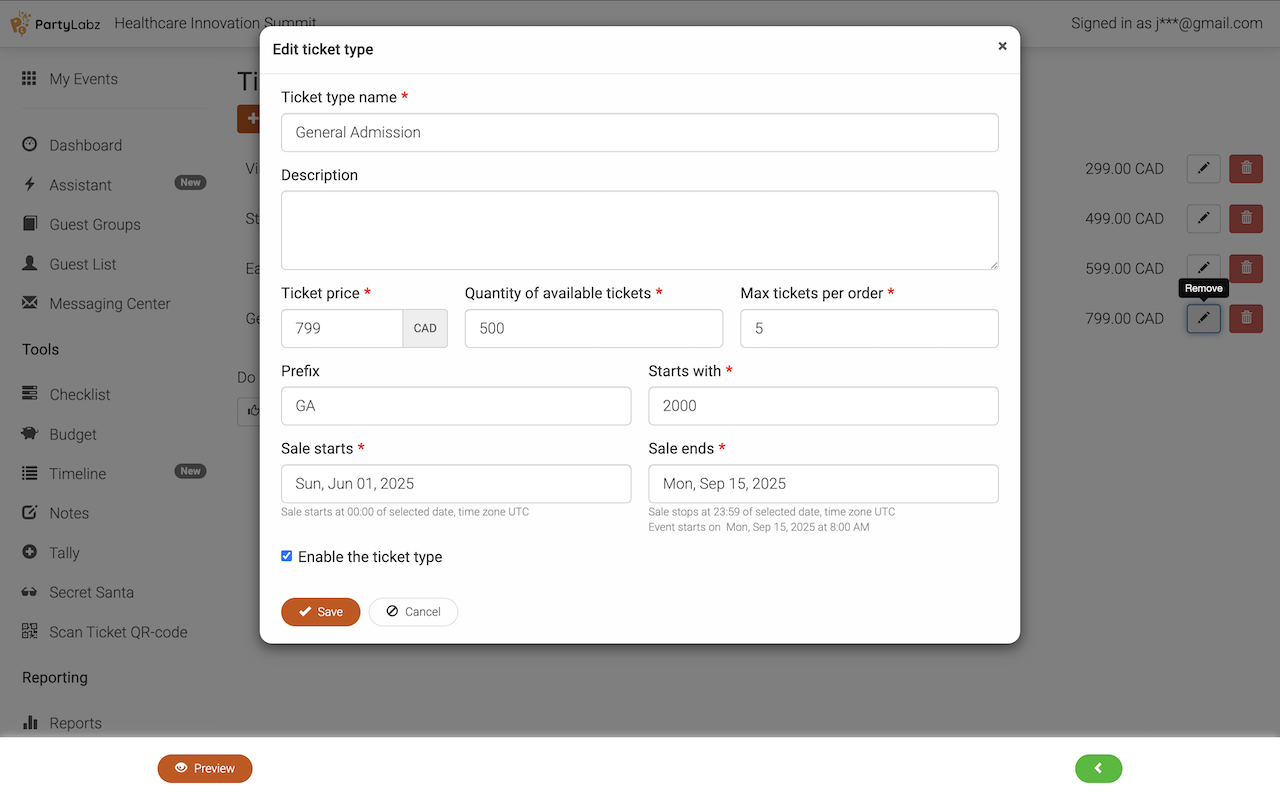
Then, head over to "Ticket Types" to create your different ticket options (like early bird or VIP), set their prices, and specify how many of each are available, and set a ticket increment number.
The Ticket Increment parameter allows you to sell tickets in batches, such as 2, 4, 8, or more. This is ideal for group discounts or when you prefer guests to purchase tickets in specific quantities. For example, setting an increment of 2 encourages guests to attend in pairs, and you can offer a discounted per-ticket price. Clearly communicate this benefit in your ticket type description: 'Get a discounted price per ticket when you come in pairs!'
You can set an 'Early Bird Price' and when it ends right inside each ticket type. This way, you don't need to make extra early bird tickets. This helps you control how many tickets you sell. For example, if you only have 100 tickets, you can sell some at a lower early bird price, but still make sure you don't sell more than 100 tickets in total.
Step 4: Test Before You Launch
Before promoting your event, it's crucial to test the ticket selling process. Enable "Test mode" on the "Ticket Settings" page. This allows you to simulate transactions without actual charges.
To buy a test ticket with a test credit card, go to the event preview and click on the "Buy Tickets" (the button name is configured on the "RSVP Settings" page).
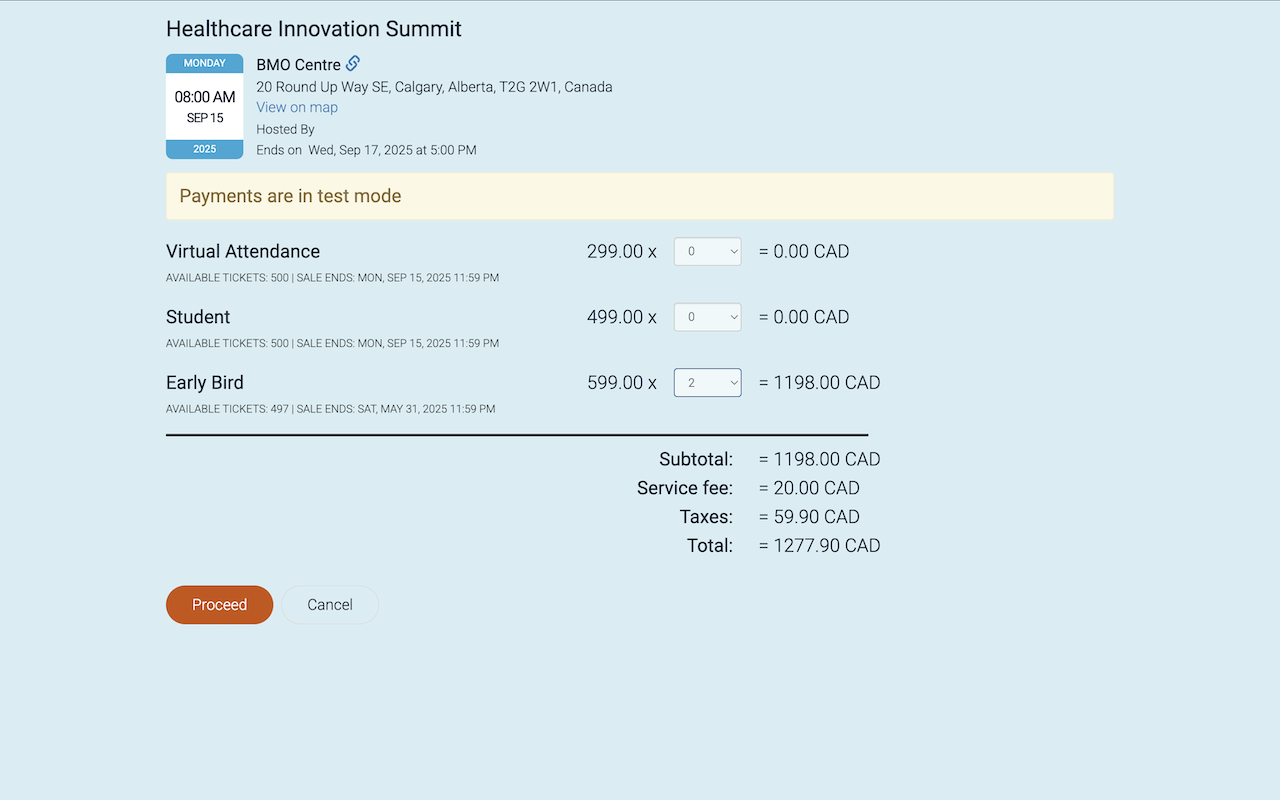
Select tickets you would like to buy, and click on the "Proceed" and enter name and address of person who buys the tickets:
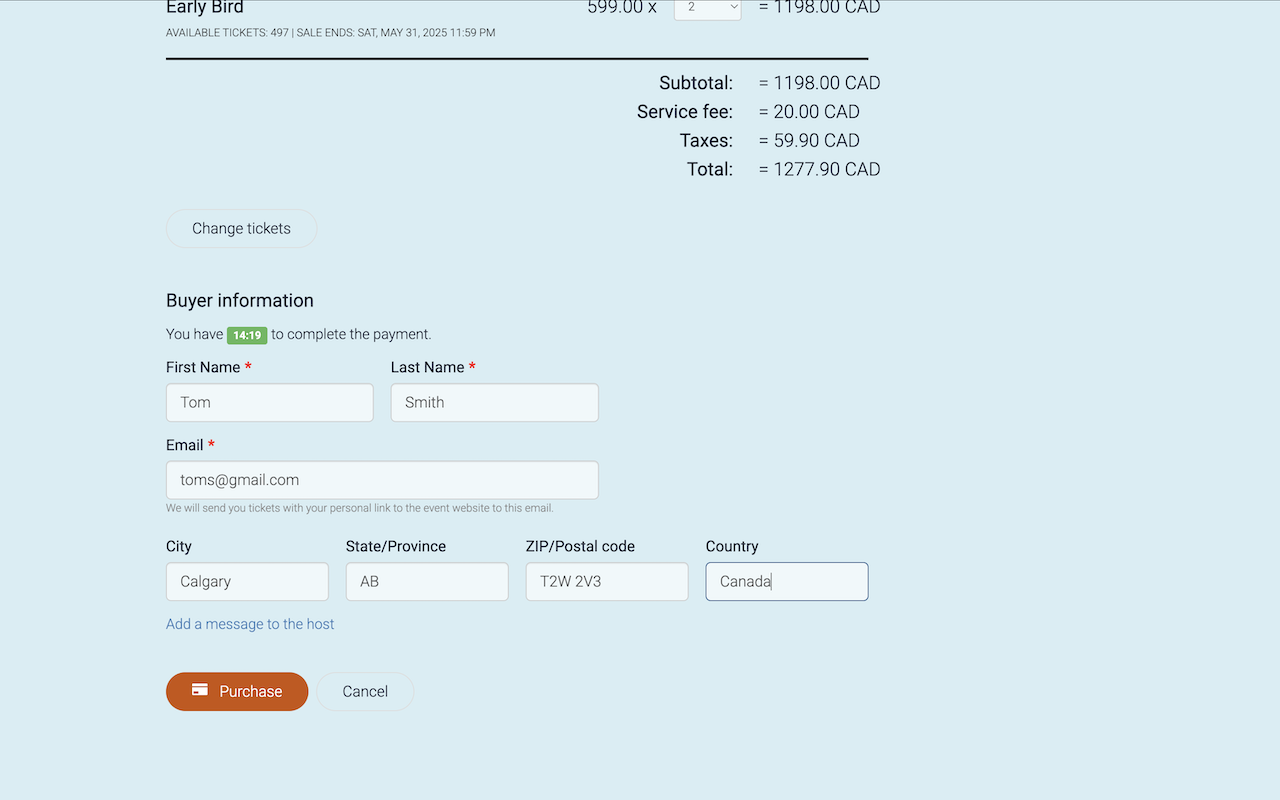
When the information is entered click on the "Purchase" button to proceed to the credit card form:
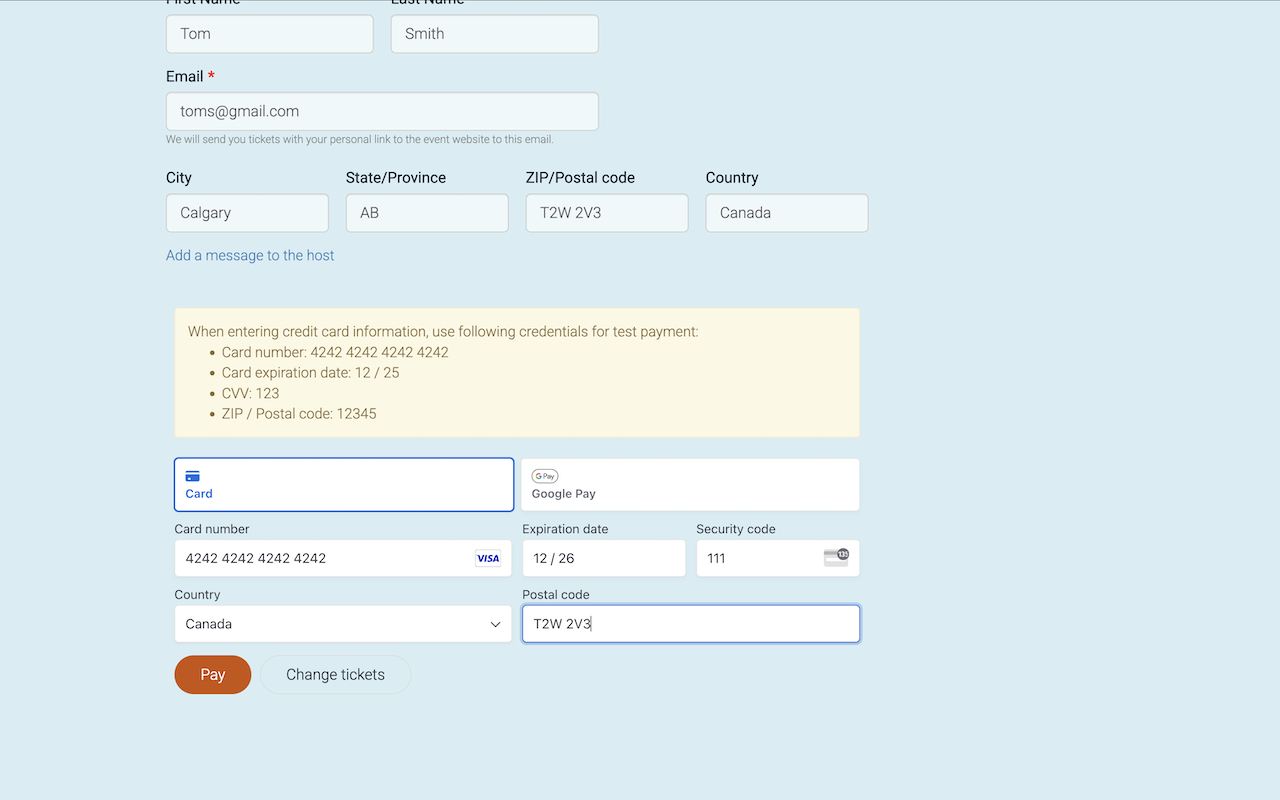
In test mode the website will let you know what credit card number and other credentials to enter. In life mode guests will need to enter their real credit card number or use Google Pay or Apple Pay to pay for your tickets.
If the payment goes well, user will be redirected to the page where purchased tickets are listed:
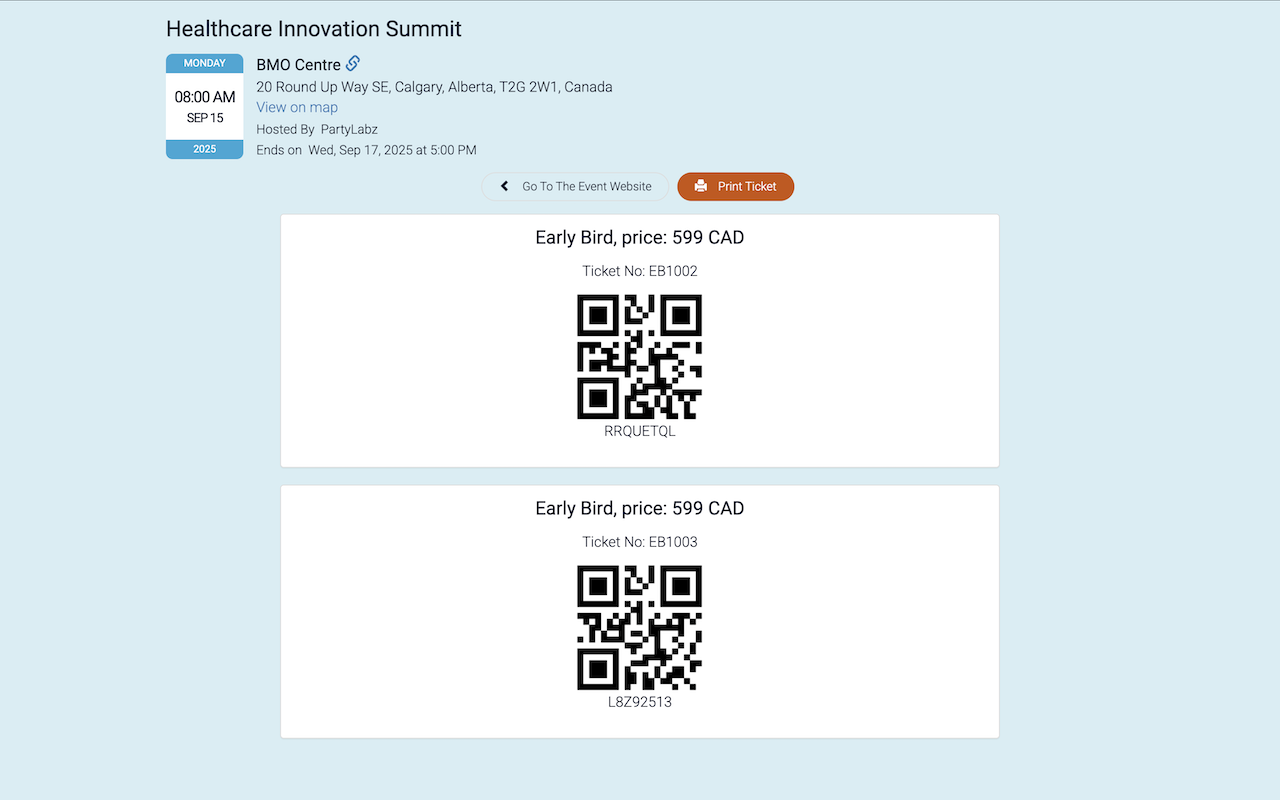
The system will send an email to guests with ticket purchase confirmation and a link to get tickets online.
Step 5: Spread the Word and Sell Tickets!
Your event website is live and ready to sell tickets! Now it's time to promote your event and get the word out.
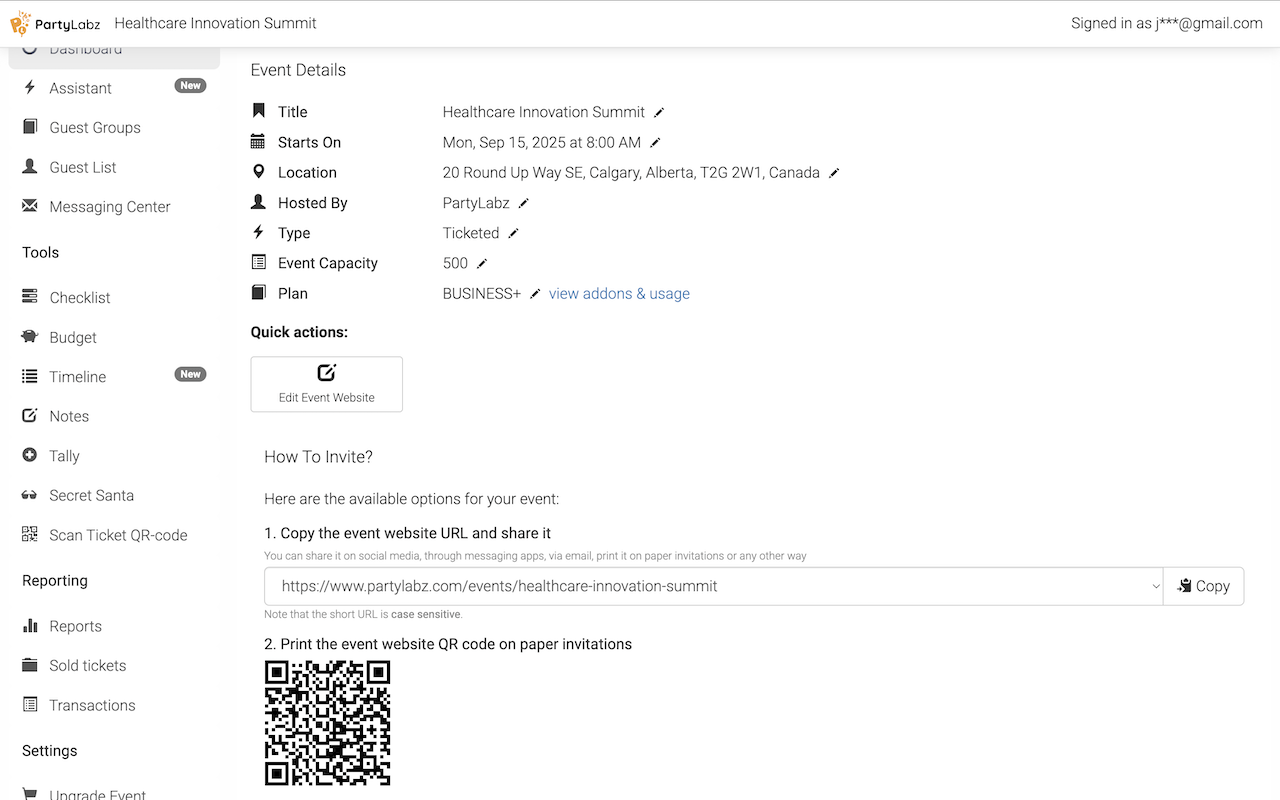
- Share your event link: On the "Dashboard" page of your event, you'll find a unique URL and QR code for easy sharing.
- Promote everywhere: Share your event link on social media, through email newsletters, by distributing flyers, or in any other way that reaches your target audience.
Step 6: Monitor Ticket Sales
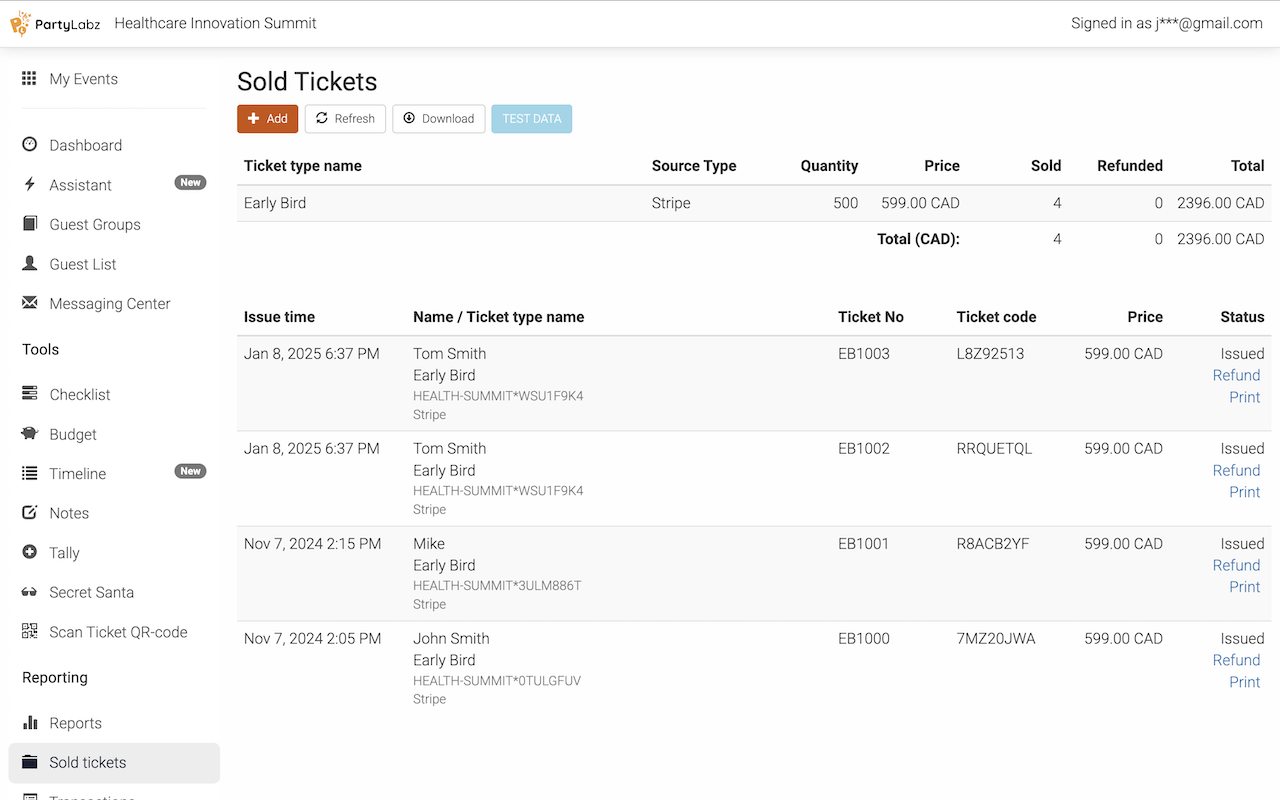
Keep an eye on your ticket sales progress on the "Sold Tickets" page. Here, you'll find details about each ticket sold and can even issue refunds if needed.
You can also easily track the number of tickets sold for each type, with a clear breakdown of how many were sold at the early bird price. Additionally, within the ticket list table, each ticket sold at the early bird price will be clearly labeled as "early bird," providing instant clarity on your sales data.
View and manage guest information, including names, email addresses, and arrival status, on the "Guest List" page.
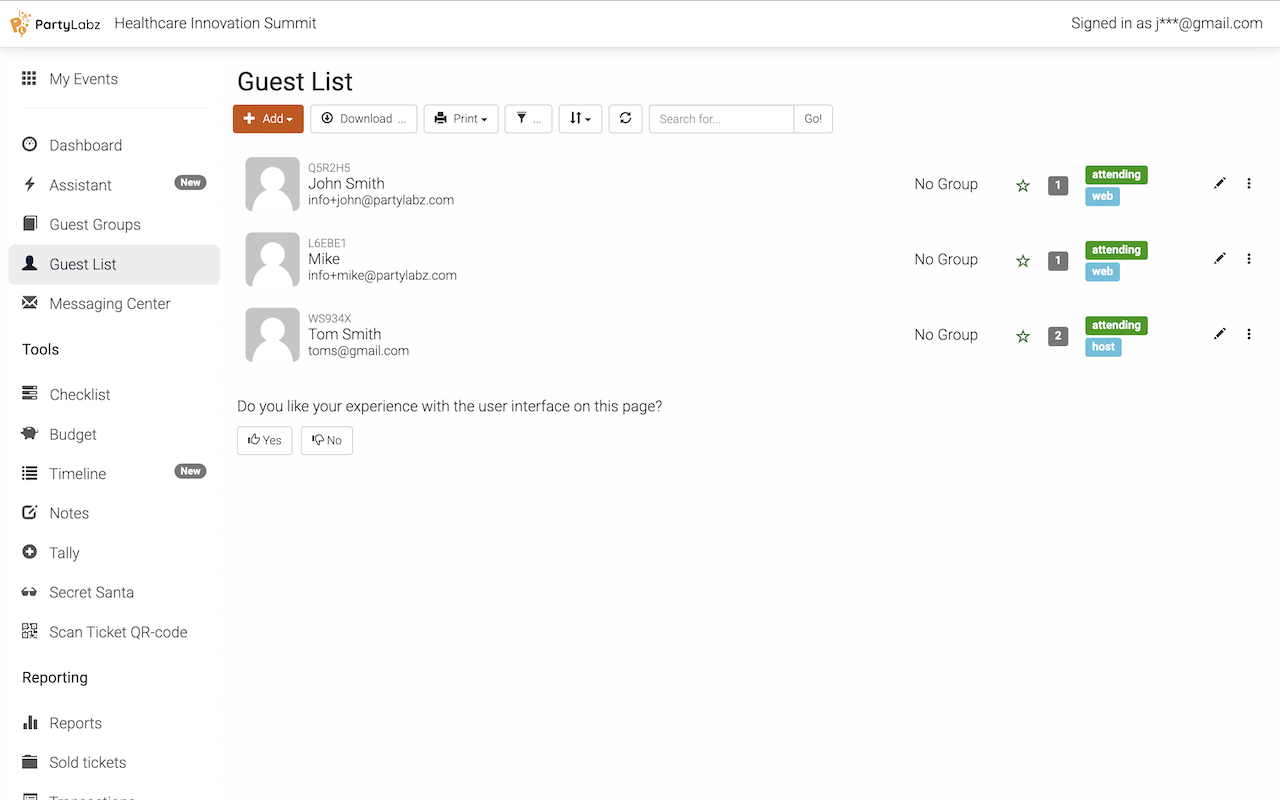
You can manage guests here, change their names, email addresses and other information. This is where you can also mark guests as arrived or departed to your event. For this, click on the three dots button next to the guest name and select the corresponding menu item.
Get a detailed overview of all sales transactions on the "Transactions" page.
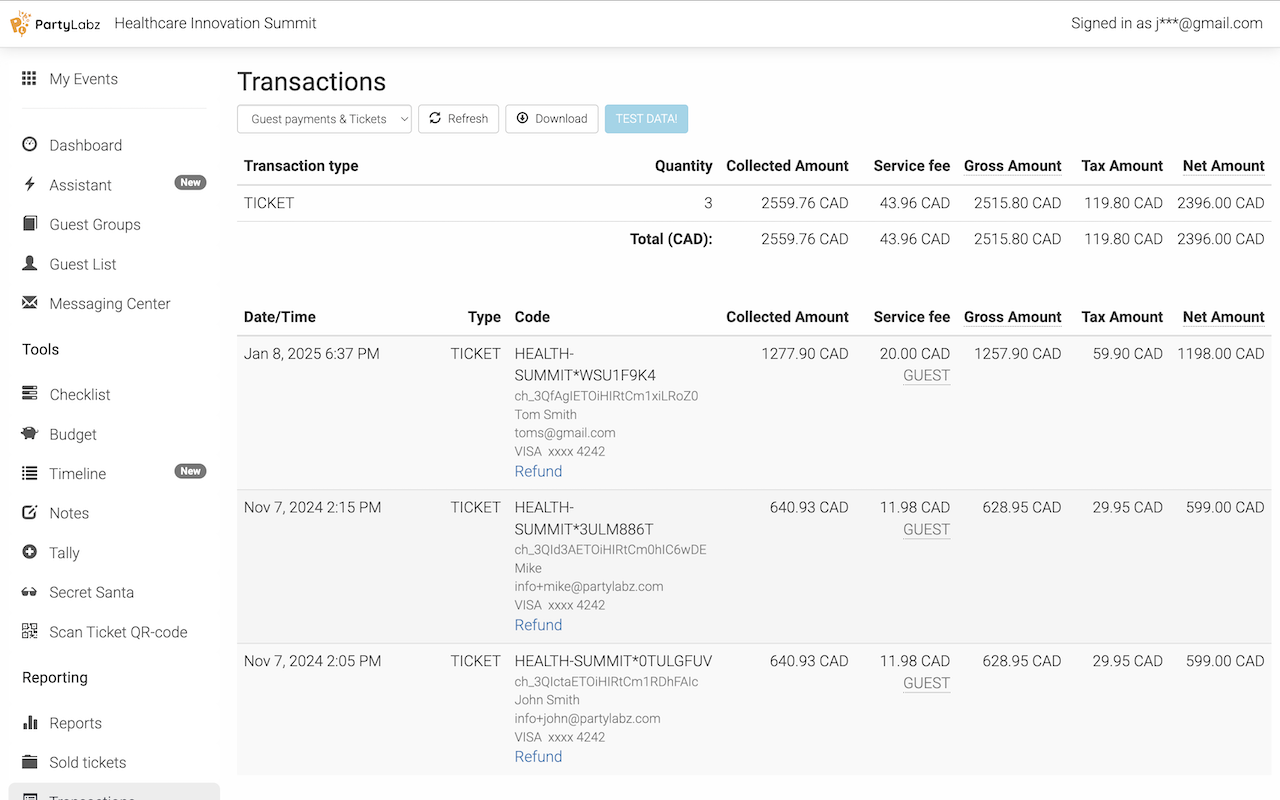
The difference between this page and the "Sold Tickets" page is that here one record represents a purchase transaction that can include several tickets at once. You can also issue a refund for the whole transaction.
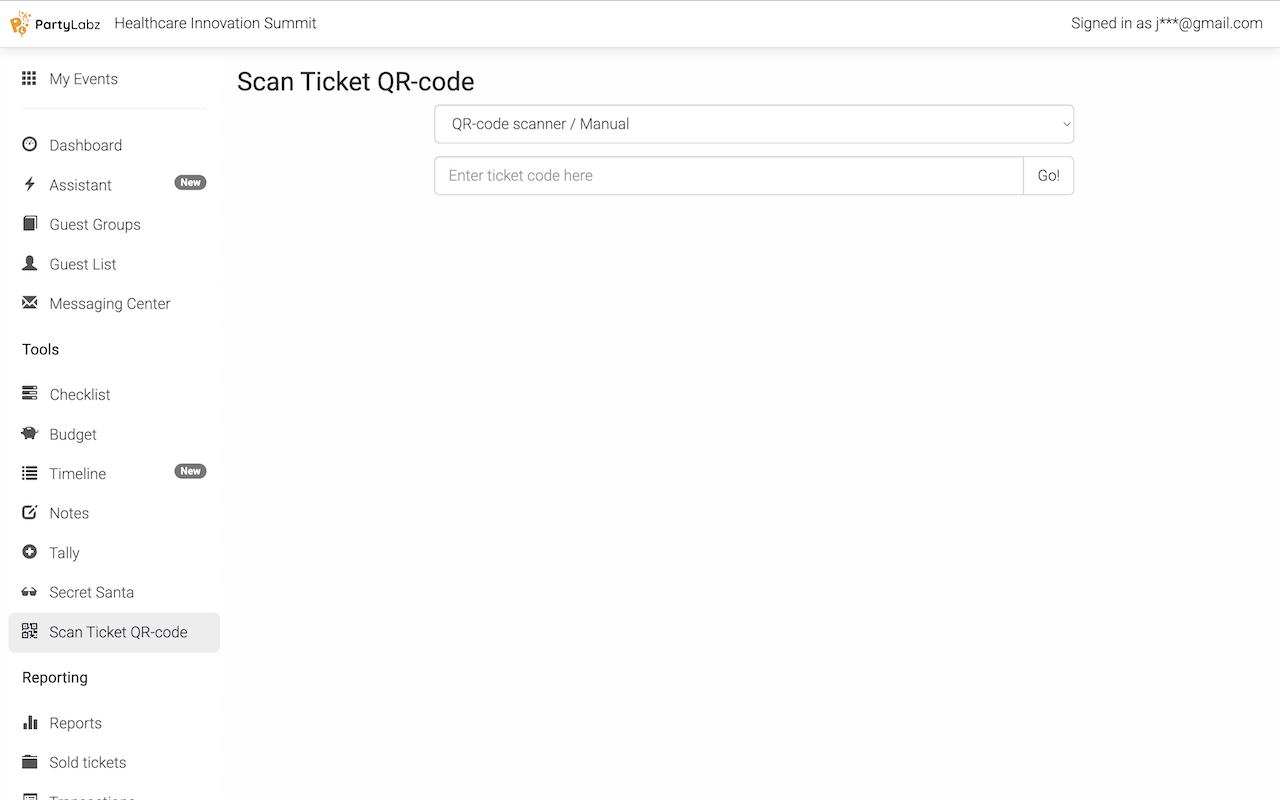
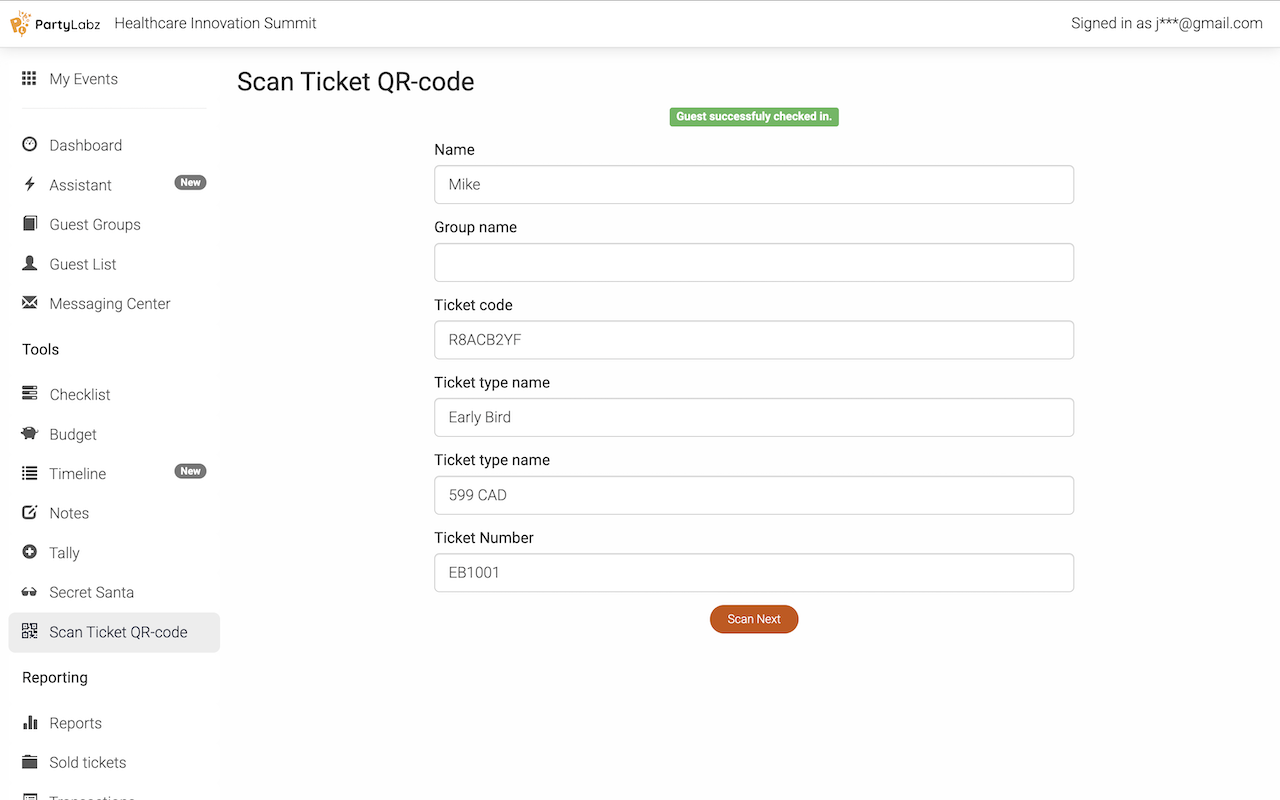
Step 7: Scan Tickets at the Door
PartyLabz makes checking in guests a breeze! On the day of your event, easily scan tickets using your phone's camera or an external QR code scanner.
- Go to "Scan Ticket QR-code": This is where the magic happens.
- Choose your scan mode: Select either "QR-code scanner / Manual" to use an external device or "Built-in camera" to use your phone's camera.
- Scan or enter the code: Simply point your camera at the QR code on the ticket (or manually enter the code) and voilà! The system will instantly display the ticket and guest details, allowing for quick and efficient check-in.

Pricing
Selling event tickets with PartyLabz is straightforward and efficient, leaving you more time to focus on making your event memorable. Plus, with a transaction fee of only 2% (minimum of $0.5 and maximum of $20 per sale), it's an affordable solution. PartyLabz transfers the ticket fees directly to your Stripe account, ensuring secure and prompt payment.
Tickets Fees Comparison
To better understand how PartyLabz compares with other ticket selling services take a look at the comparison
Your expenses on service fees:
Prices are current as of January 8, 2025 and were taken from the companies' respective official websites.
| Service | Fee | Fee Amount |
|---|---|---|
In summary, PartyLabz's Event Tickets Selling feature provides everything you need to sell tickets online without hassle. From creating an elegant event website to managing sales and promoting your event, PartyLabz simplifies the entire process. Don't let ticket selling overwhelm you—let PartyLabz take care of the details so you can focus on hosting an unforgettable event.
Do you find content on this page helpful?