When an event is created you need to add a new tab. You can do it by either clicking on the plus icon in the tabs row or selecting 'Menu - Add a tab' item.
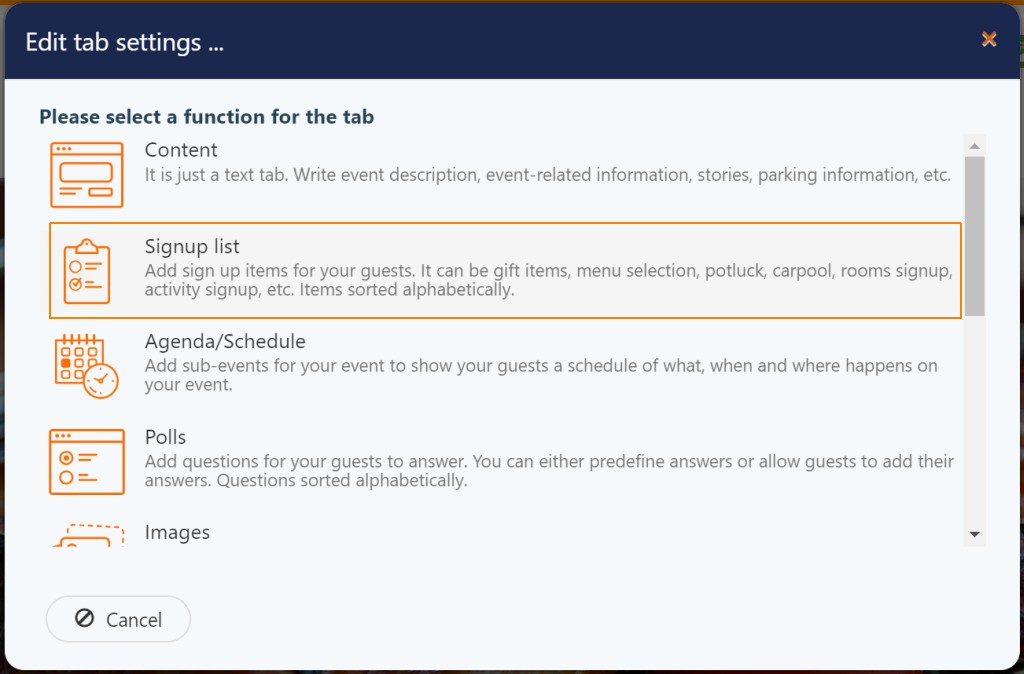
In the popup dialog:
- Select 'Signup list' function
- Choose an icon for the new tab
- Enter the tab name
- o allow your guests adding new items (their cars) select 'Guests' in the drop-down list 'Who can change function data on the tab'
- Click 'Save'.
Congratulations! Your carpool tab is ready!
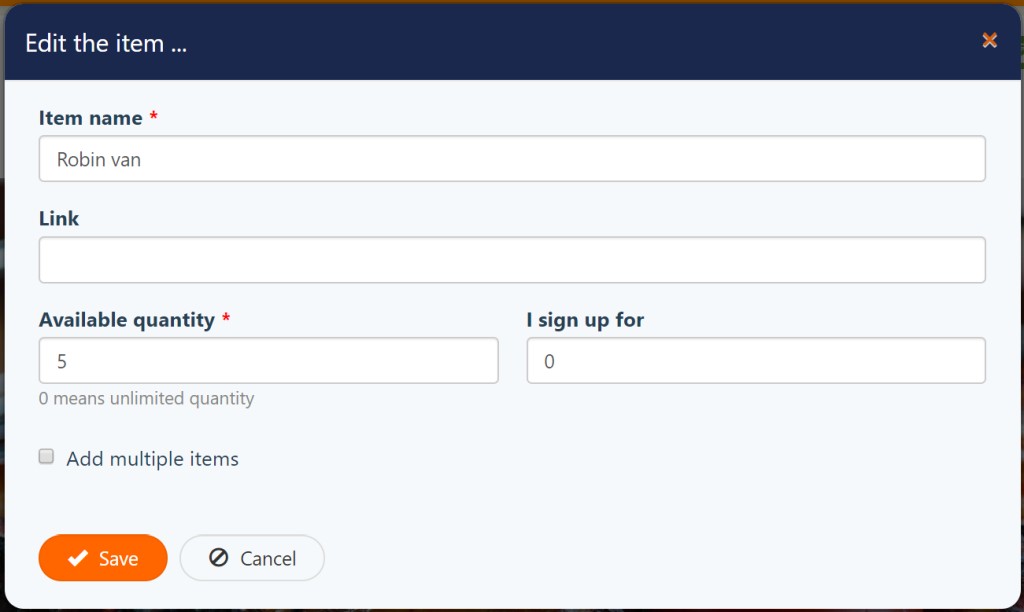
Let's say, Robin has a van with five free seats and he is willing to participate in the carpool. He enters the website as a recognized guest (reference).
Then, he goes to the 'Carpool' tab and clicks on the 'Add ...' button to add his car. In the popup dialog, he enters 'Robin van' in the 'Item name' input field, then 5 in the 'Available quantity' and, finally, clicks on the 'Save' button.
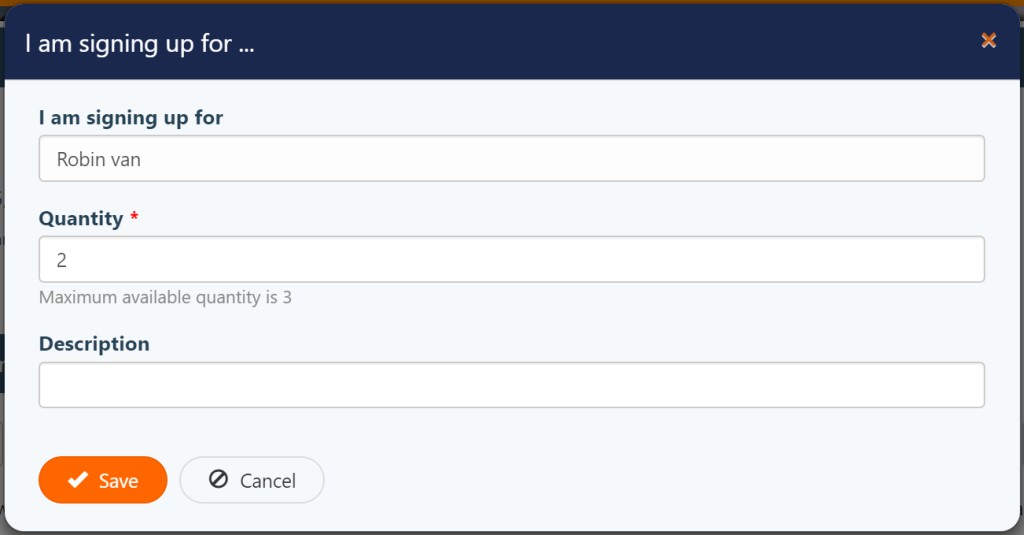
Now, let's see how other guests can sign up for available cars and seats. For example, Jeff needs two seats for him and his wife. He goes to the website using a personal link, so the system knows who he is. Jeff selects the 'Carpool' tab, finds a car with 2 available seats, and clicks on the 'Signup' button. In the popup dialog he enters 2 in the 'Quantity' input, optionally enters some comments, and clicks on the 'Save' button to complete the signup process.
After all the guests signed up you can see the results on the tab in 3 ways:
- Clicking on the ‘eye’ icons of each car and see all signed up guests with their descriptions;
- View report with data grouped by cars by clicking on the ‘Print - Print (group by items)’ button in the toolbar;
- View report with data grouped by guests by clicking on the ‘Print - Print (group by guests)’ button in the toolbar.
Below is short video tutorial how it works:
If you have any questions or suggestions regarding the signup list functionality please feel free to leave your comments below or send them via our contact page
Advertisement
Do you find content on this page helpful?